Applying GIS tools to urban planning projects sometimes entails working with tens of thousands of features. Determining the number of bus stops in a city, houses in a town, or streets in a county are a few examples. GeoPlanner for ArcGIS is an app for creating, analyzing, and reporting on various urban planning scenarios.
Scenarios in GeoPlanner are unique planning alternatives. To use your data in a scenario, you must import or sketch it in. GeoPlanner has the following limits on the maximum number of features you can import into a scenario at once:
• Polygons: 10,000
• Lines: 15,000
• Points: 25,000
10,000 or more features is a lot of data to work with in a scenario. You generally don’t need this many features in a scenario unless you want to review key performance indicators or run reports against all that data. If you just want to view 10,000 or more features, create a vector tile or map layer and add it to your GeoPlanner project. Otherwise, follow the tips in this post to work around the thresholds.
Say you’re a GIS Analyst for the Department of Economic Development in Los Angeles. You’re charged with identifying the best location for a new mixed-use development composed of a film studio, offices, and restaurants in North Hollywood. The development will generate jobs and tax revenue for the community.
You’ve already created a feature layer of North Hollywood’s 25,418 land parcels in ArcGIS Desktop, and shared this layer as a web layer to your ArcGIS organization.
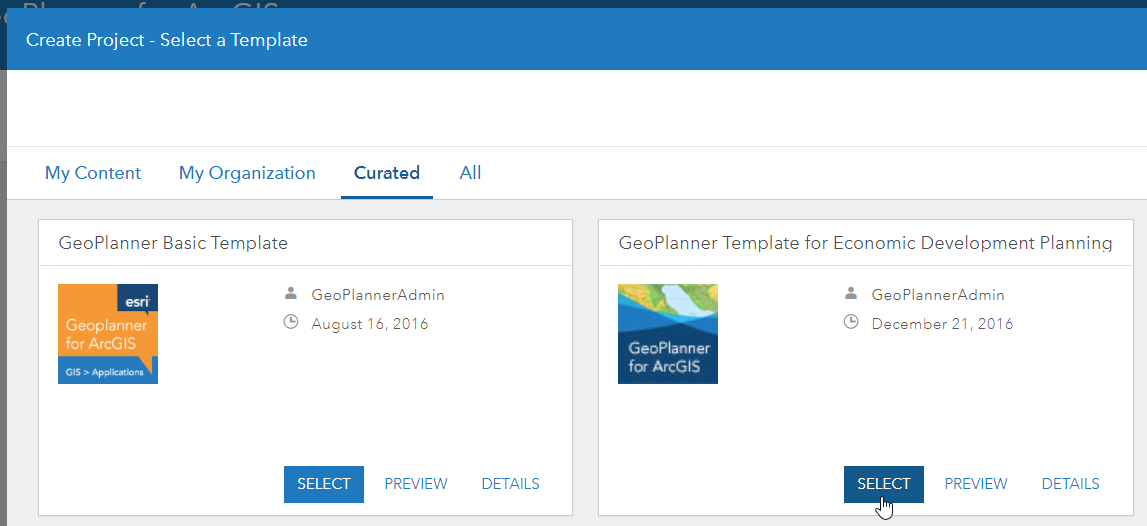
Now, sign into GeoPlanner and create a new project using the template for Economic Development Planning.
Let’s say you want to import all the parcels into a scenario. First, you need to add the parcel data to your project. Then you need to separate the parcel data into three sets and run the Import Scenario tool for each set.
Note: You can also start importing data with the Add to Design Layers tool, however, you need to use the Import Scenario tool to import additional features after the first set.
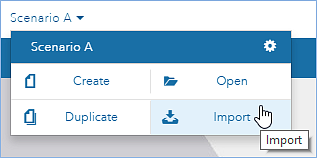
You can access the Import Scenario tool by clicking the scenario dropdown in the upper-left corner of the application, and choosing Import.
How do you separate your polygons into three sets? There are several ways to do this:
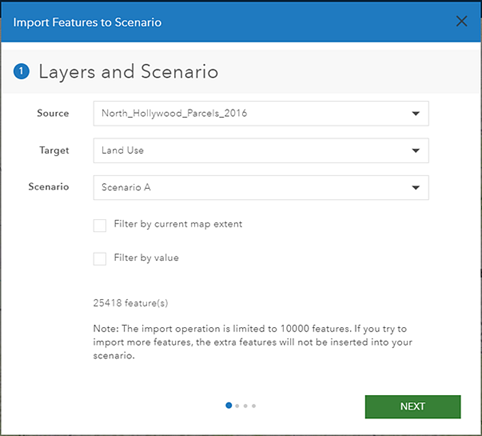
- Use filters in the Import Scenario tool: At the bottom of the first screen in the Import Features to Scenario dialog box, you’ll see two options for filtering features: Filter by current map extent and Filter by value. You can use one or both options to limit the number of features you import into the scenario at once. Filter by current map extent limits the features imported to just those that are visible in the existing map extent, whereas Filter by value limits features based on an attribute value for a particular field. For example, you can filter features by their values of either residential, commercial, or industrial for the field Land Use Type.
- Set study areas: Study areas are planning subareas, such as the NoHo Arts District within North Hollywood. You can define multiple study areas of less than 10,000 polygons, and then apply the Import Scenario tool to each study area. The tool will only import features that intersect or lie within an enabled study area. To ensure that each study area has less than 10,000 polygons, use the dashboard widget, which will only display quantitative and qualitative data for the activated study area.
- Divide a layer into multiple layers: You can create multiple filtered layers from a single feature layer using the Map Viewer available in your portal or ArcGIS Online, and then apply the Import Scenario tool to each layer. To create several filtered layers, use the Copy function to create replicas of the layer, and the Filter function to set a different filter on each copy. See Copy layer and Create filters in the ArcGIS Online help for details.
After you have finished importing all the features into your scenario, you can resume your original task: finding the best location for the mixed-use development. Add demographic and transportation data to the scenario to inform your analysis, use the Find Existing Location tool to select parcels that meet criteria for a mixed use development, and create multiple scenarios with different selected parcels to compare them side-by-side. You can also create reports of key performance indicators to better understand the effects of the scenarios. See GeoPlanner’s documentation for ideas and tips.
Have questions or comments about this? Let us know at the GeoPlanner for ArcGIS GeoNet community.

Article Discussion: