Build a city in less than 5 minutes
CityEngine is a powerful tool for transforming 2D GIS data into Smart 3D City Models. But what if you don’t have 2D GIS data to start with? No worries, CityEngine has you covered. Last year’s 2016 release introduced the “Get Map Data” tool – which allows you to import terrain, imagery, basemaps, and Open Street Map data directly into your CityEngine scene. And transforming your Open Street Map data into a 3D model is easier than ever with customized rule files for reading & translating the attributes typically found in OSM datasets.
Today we’ll walk through 6 easy steps to get you up & running with the Get Map Data tool. Prefer to watch a video? This tutorial is also available on YouTube. (pssst – don’t have CityEngine? Try it for free here)
Step 1 – Create a new scene
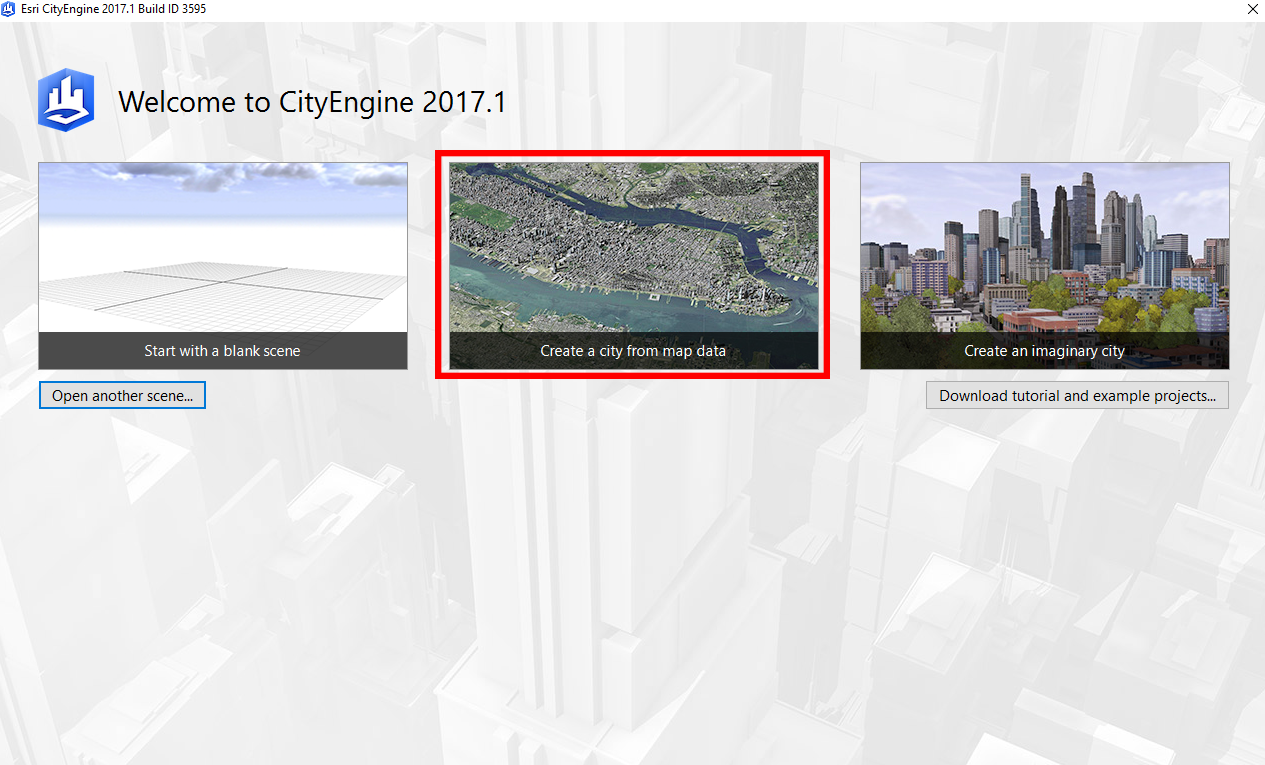
After downloading & installing the software, open CityEngine. The Welcome Wizard will appear, giving you the option to start with a blank scene, create a city from map data, and create an imaginary city. Since we don’t have data to work with yet, we want to create a city from map data.
Click on the create a city from map data option.
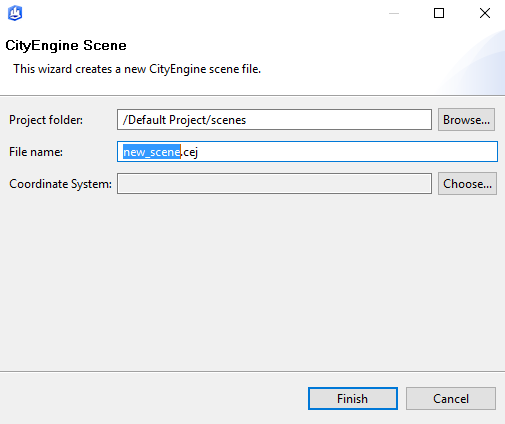
 Next, pick a name for your scene. The scene will be saved to your default CityEngine project.
Step 2 – Log-in to ArcGIS Online or Portal
After you create your new scene, you’ll use your ArcGIS Online or Portal credentials to sign in. This allows us to connect to data sources online.
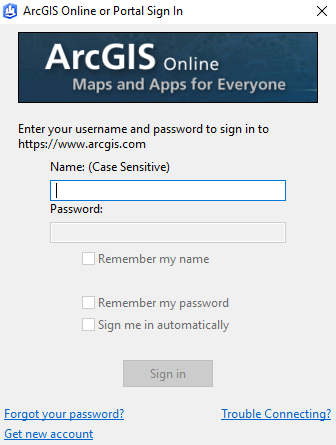
Note: your username is case sensitive, so be aware of rogue upper/lowercase letters!
Step 3 – Define the resolution of the terrain & imagery
After signing in, the Get Map Data viewer will pop-up.
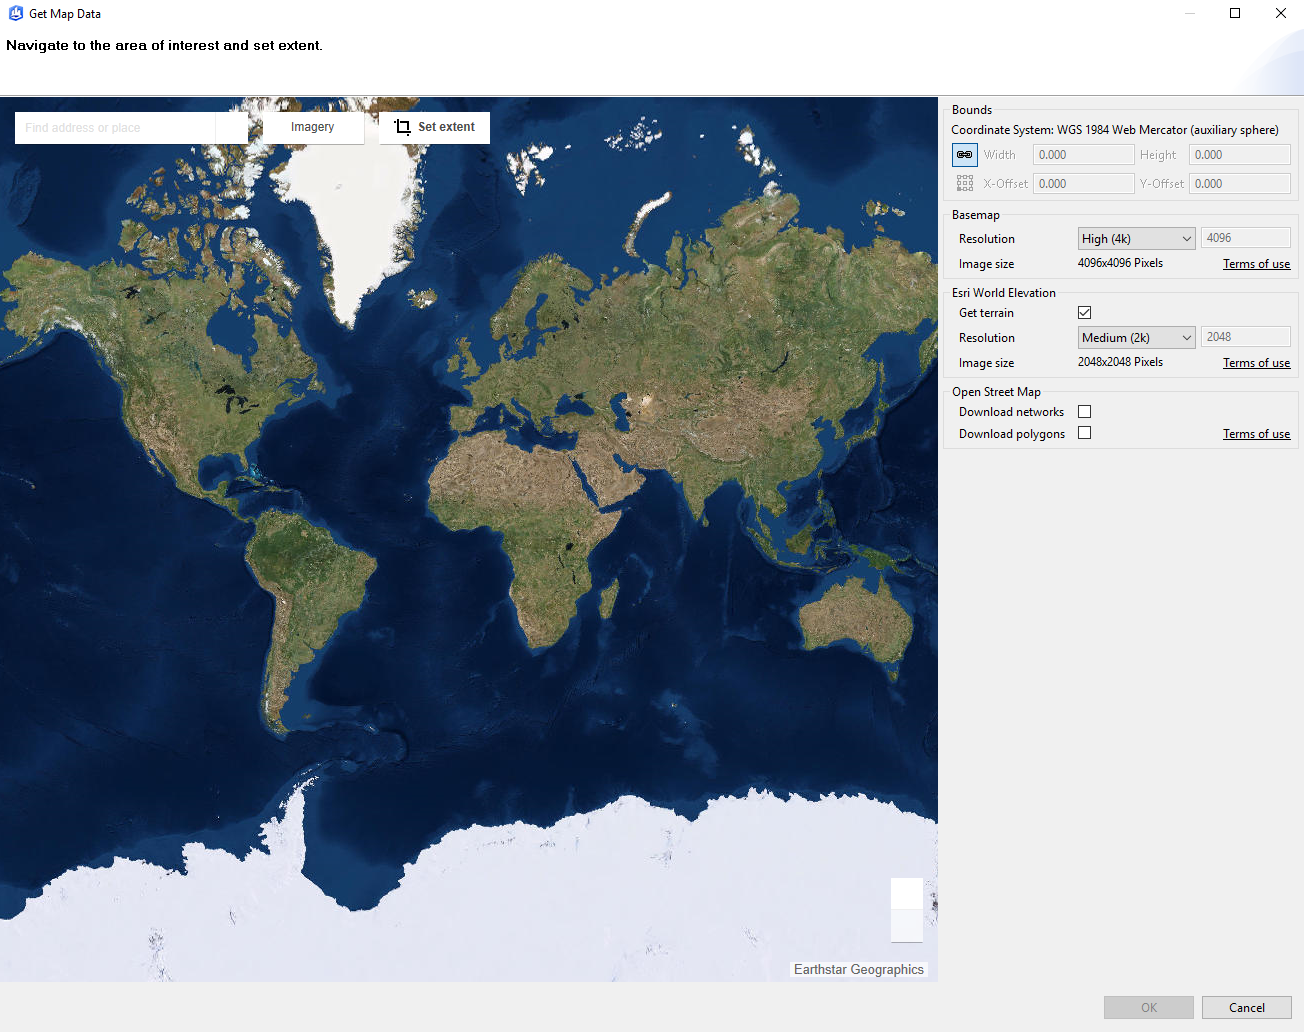
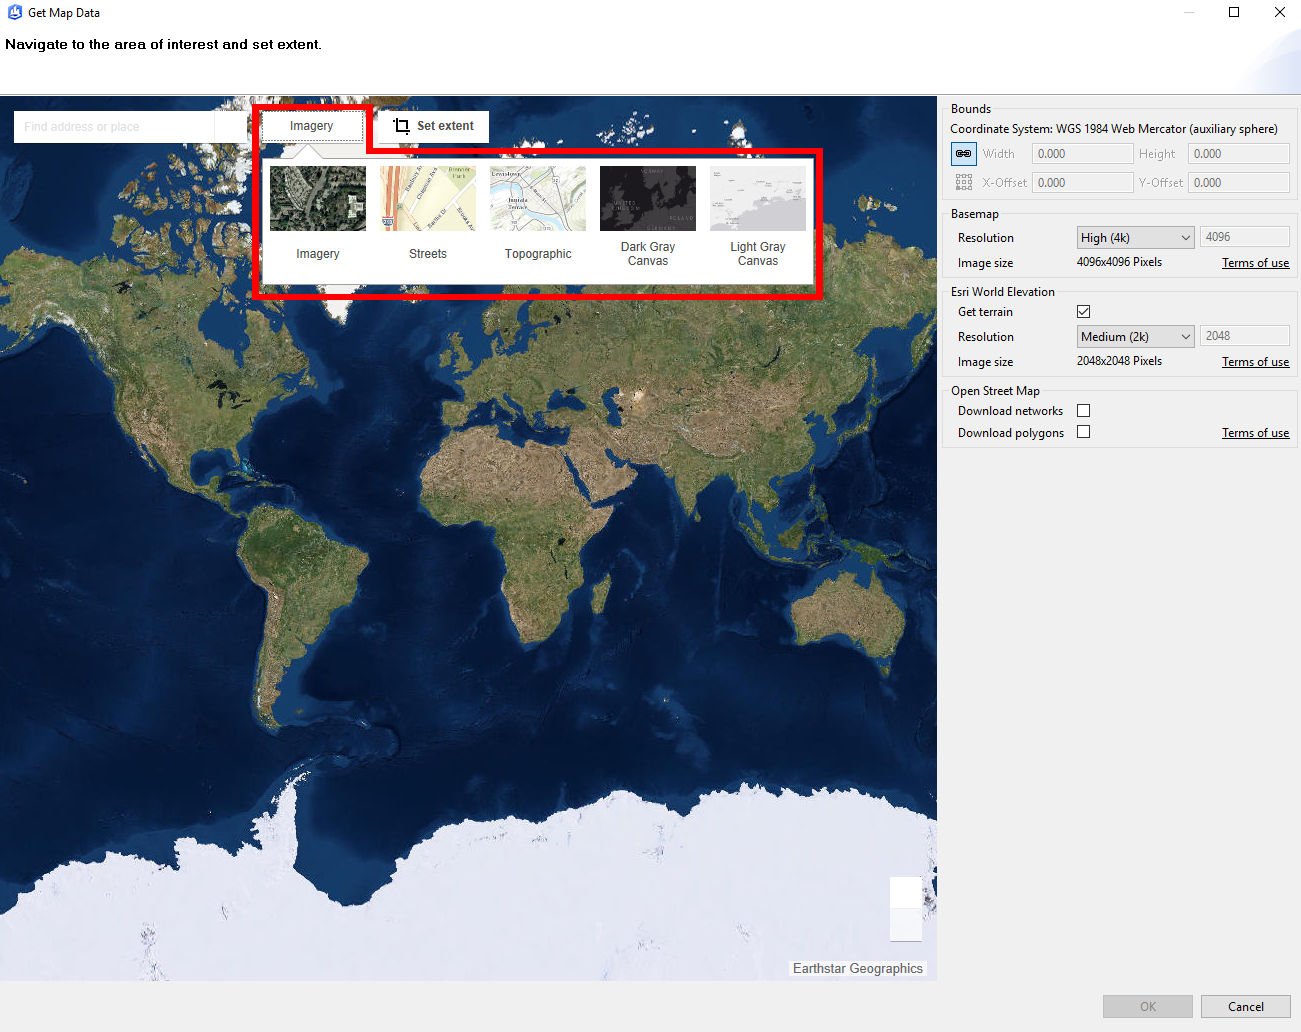
Before setting the extent of the area of interest, you have the option to choose which basemap you want to download. The default selection is Esri’s Imagery, however, you can also choose between several other basemaps (such as streets, dark theme, light theme, etc.) by clicking the dropdown highlighted below.
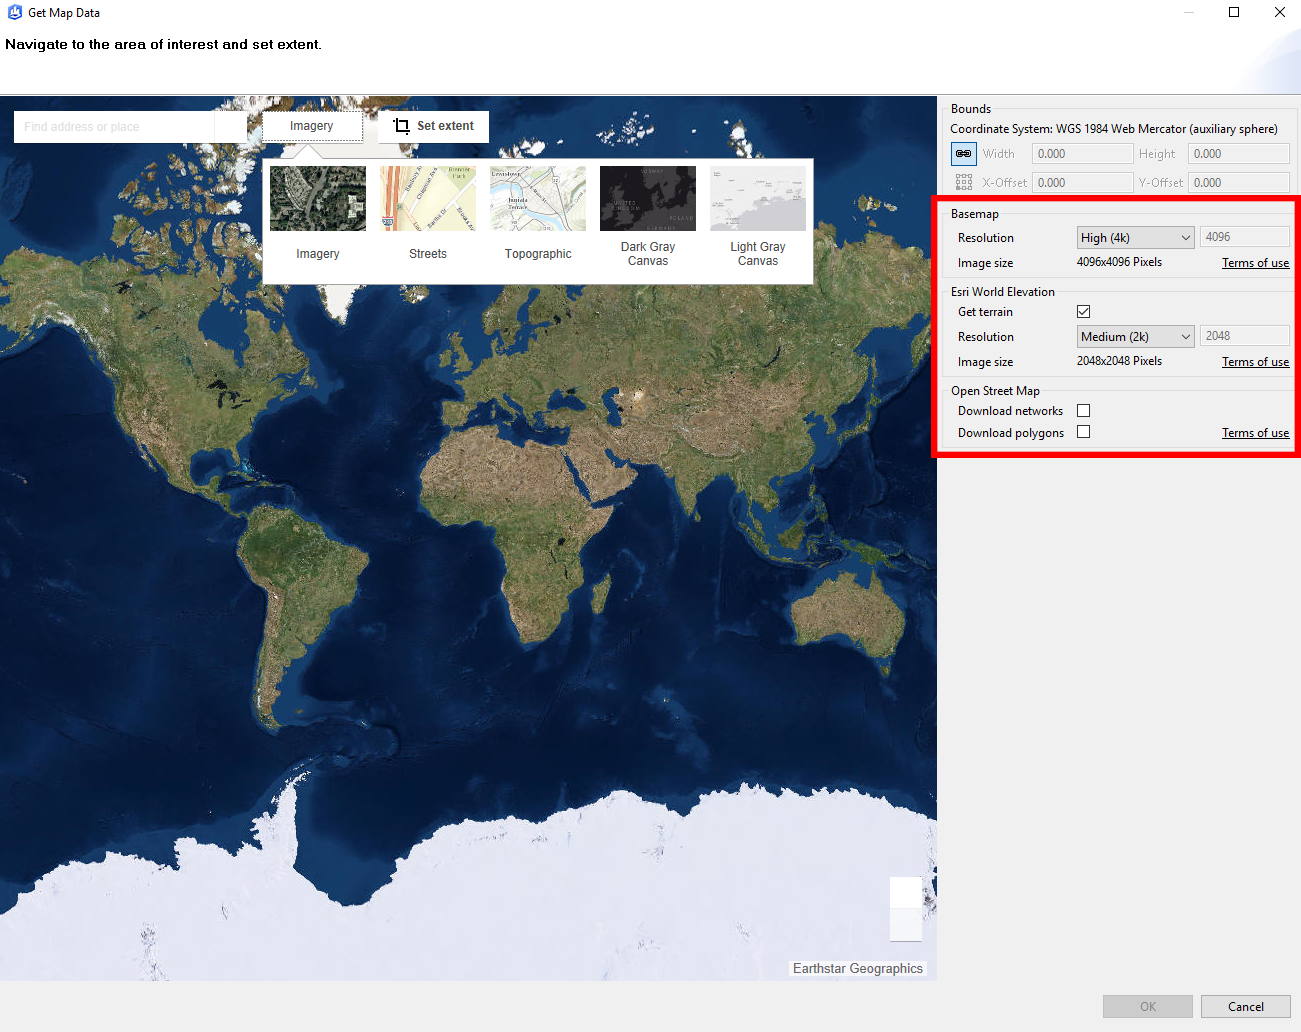
You may also want to edit the resolution of the basemap and world elevation that you’ll be importing. The panel on the right side of the Get Map Data viewer allows you to change the basemap resolution, along with the World Elevation resolution. The default for the Basemap resolution is High, and the default of the terrain download is Medium.
This is also where you select whether you’d like to download Open Street Map data networks, polygons, or both. Make sure you check these boxes if you’d like to download street networks and building polygons from Open Street Map.
Step 4 – Select the area you wish to download data from
After you’ve set the resolution of your basemap/terrain, you’ll search for your area of interest & select the extent. This tells the tool where exactly to download the terrain, imagery, and Open Street Map data from.
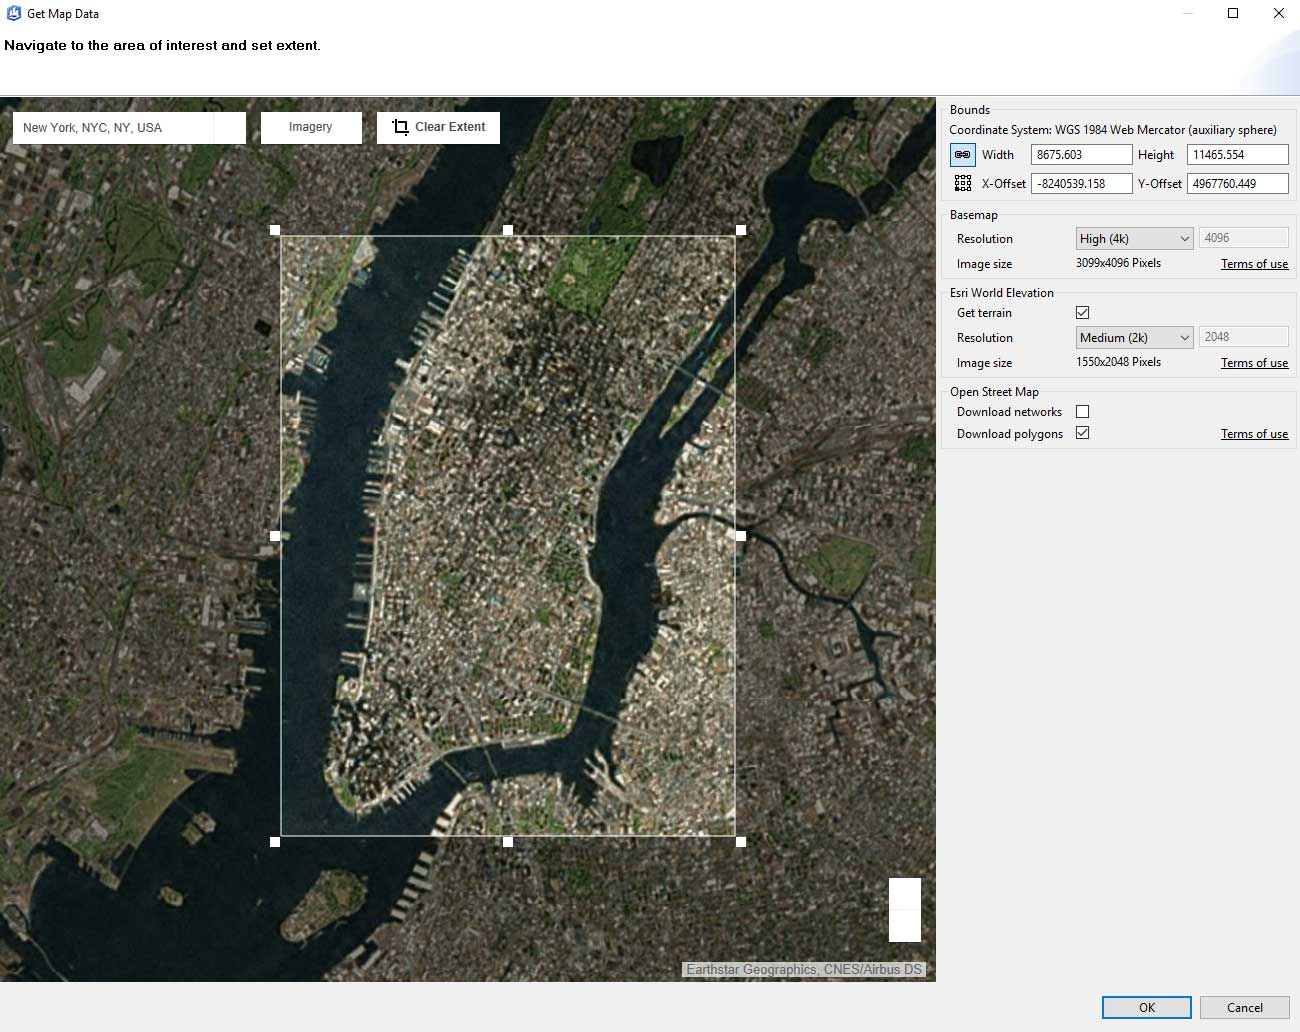
Click OK once you’ve set the extent & the resolution of your basemap/terrain, and checked the download Polygons box (to download building footprints within the Area of Interest).
Step 5 – Select the Open Street Map layers you want
Now, you have the option to pick and choose which Open Street map layers you want to bring into your CityEngine Scene.
Note: Buildings & Roads are automatically selected for you if you checked the download polygons and download networks boxes in Step 3.
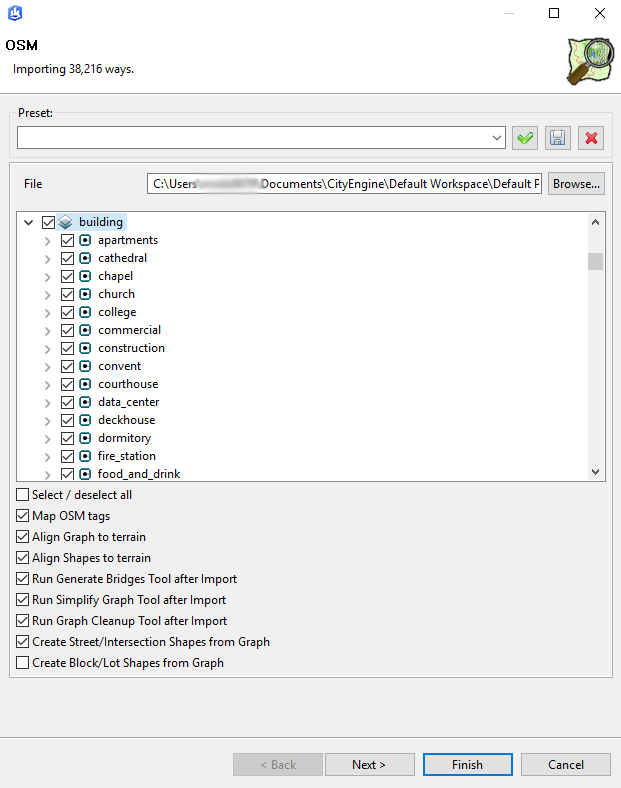
Click Finish to import the data into your scene.
Step 6 – Click generate to apply the standard Open Street map rule
The terrain, imagery, and building footprint polygons will be automatically imported into your scene. The polygons are still in a 2D format, and need to have a rule applied to make them three dimensional.
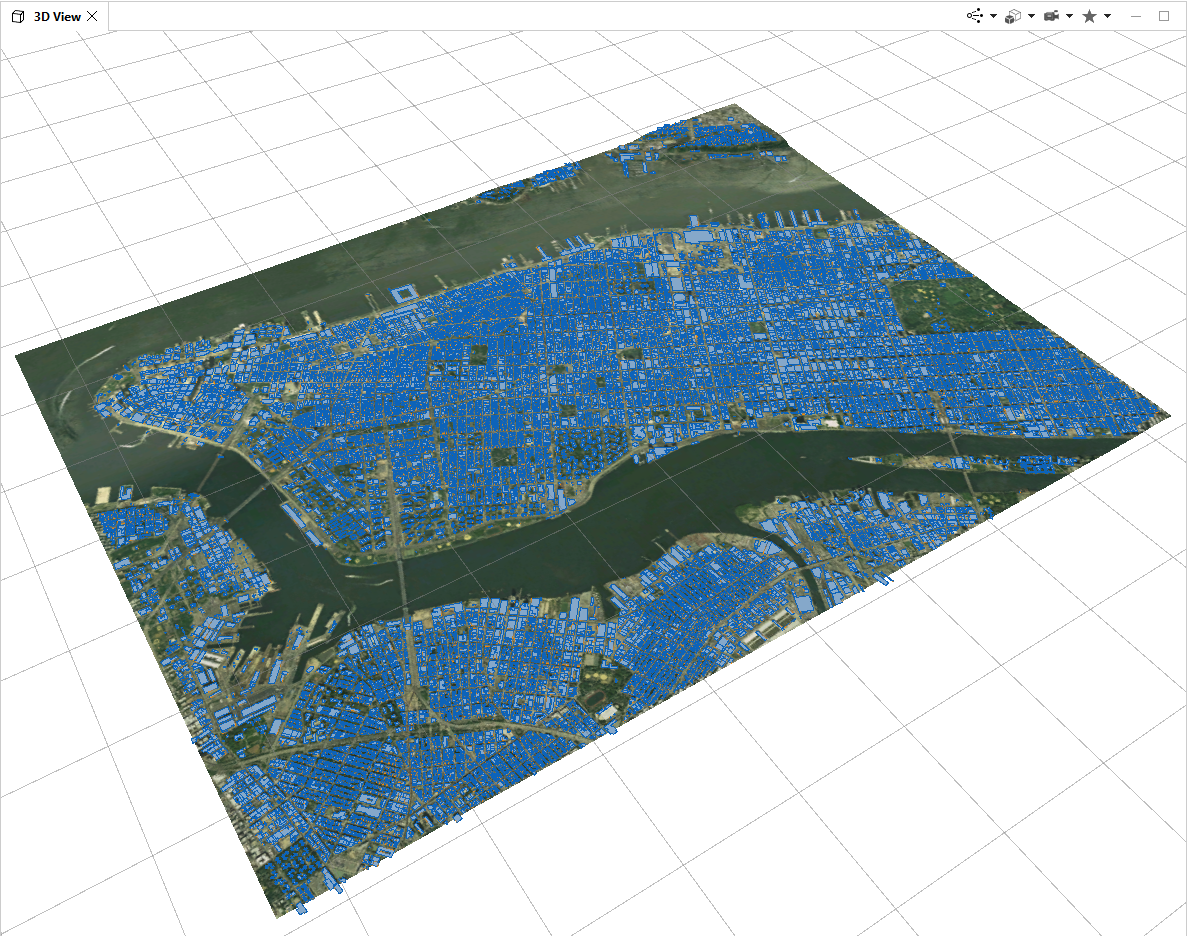
With the building polygons selected, click on the Generate button to apply the Open Street Map CGA rule.
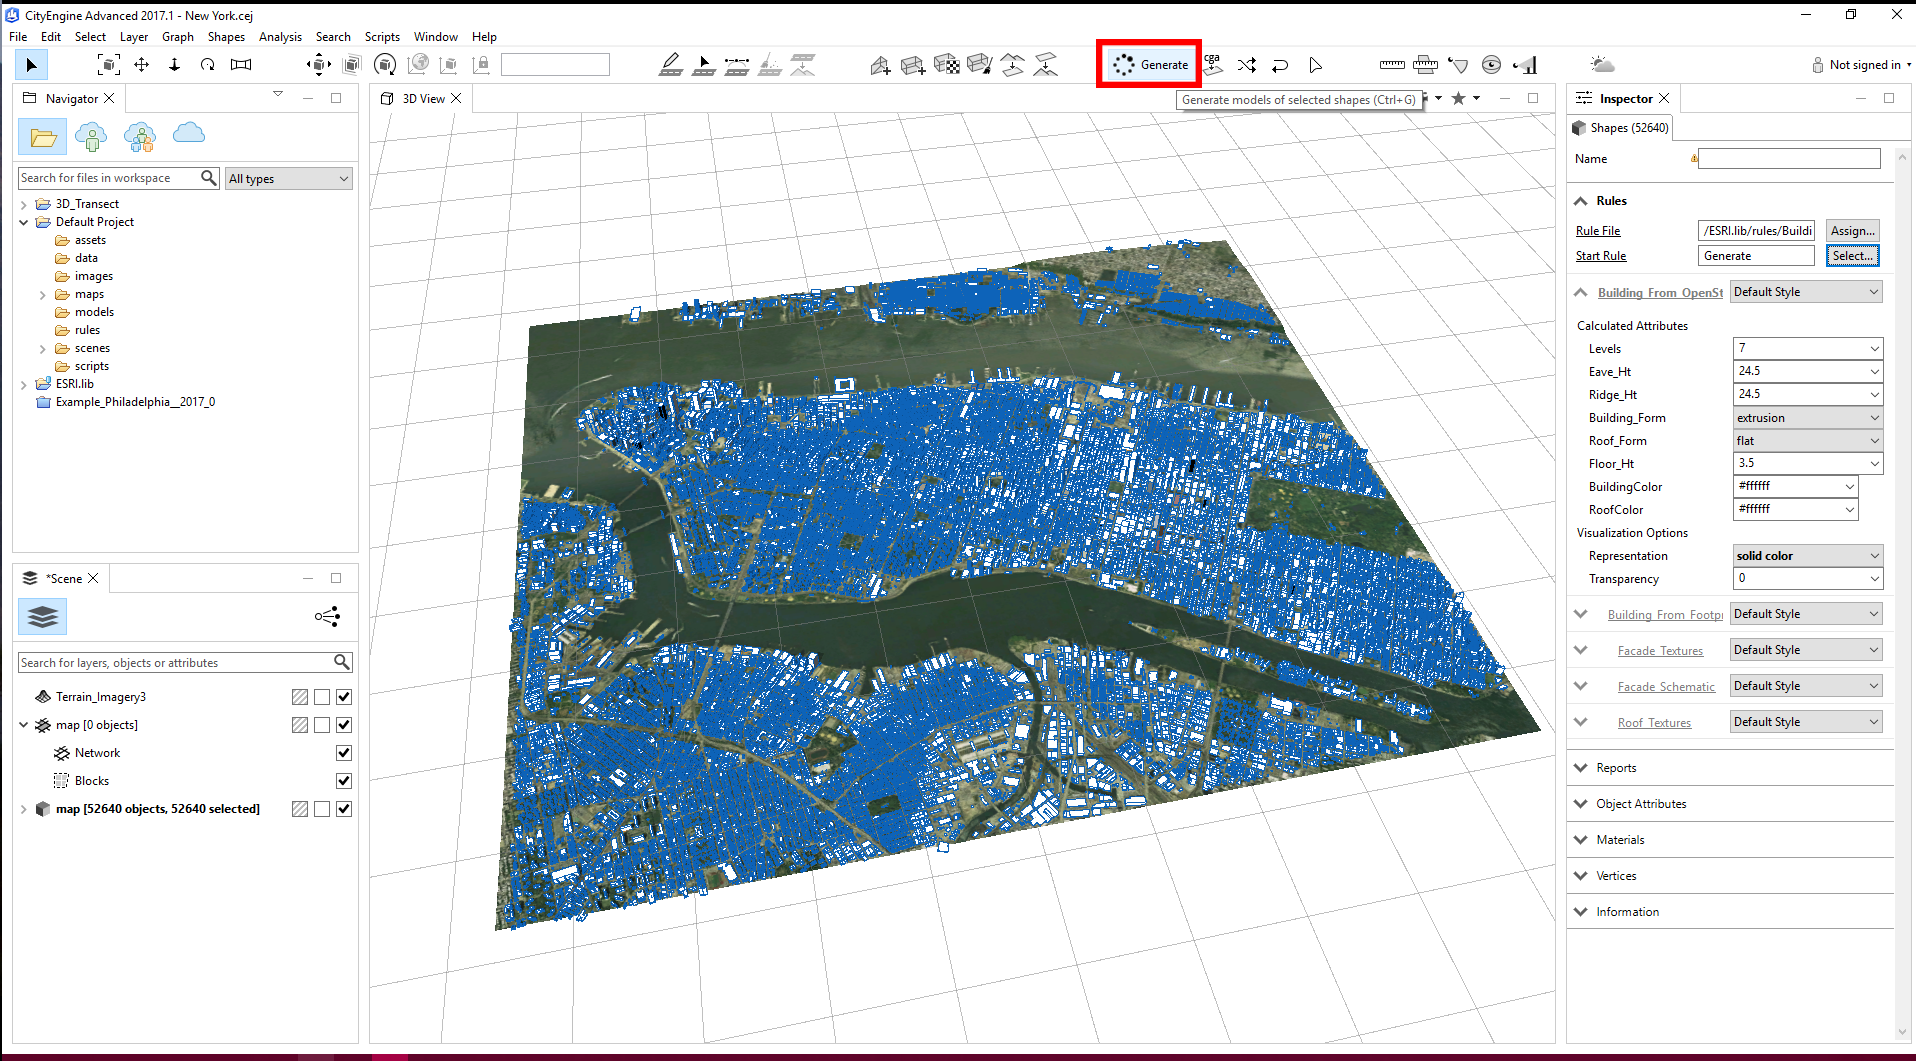
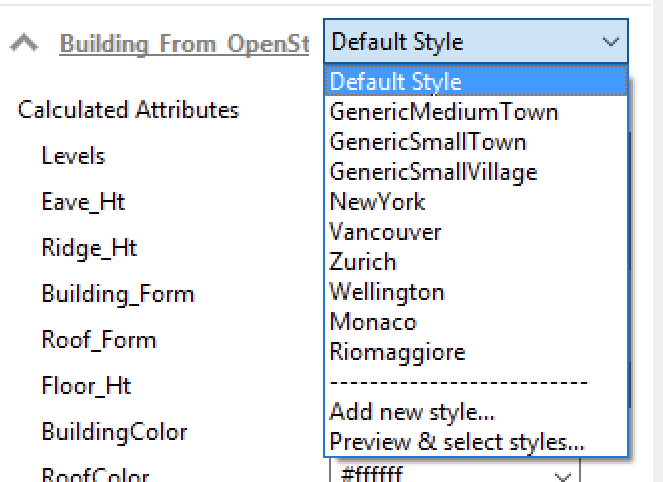
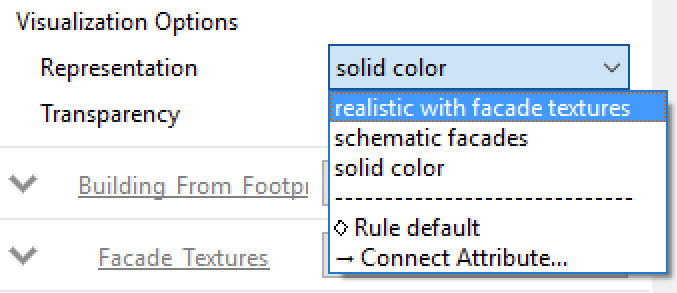
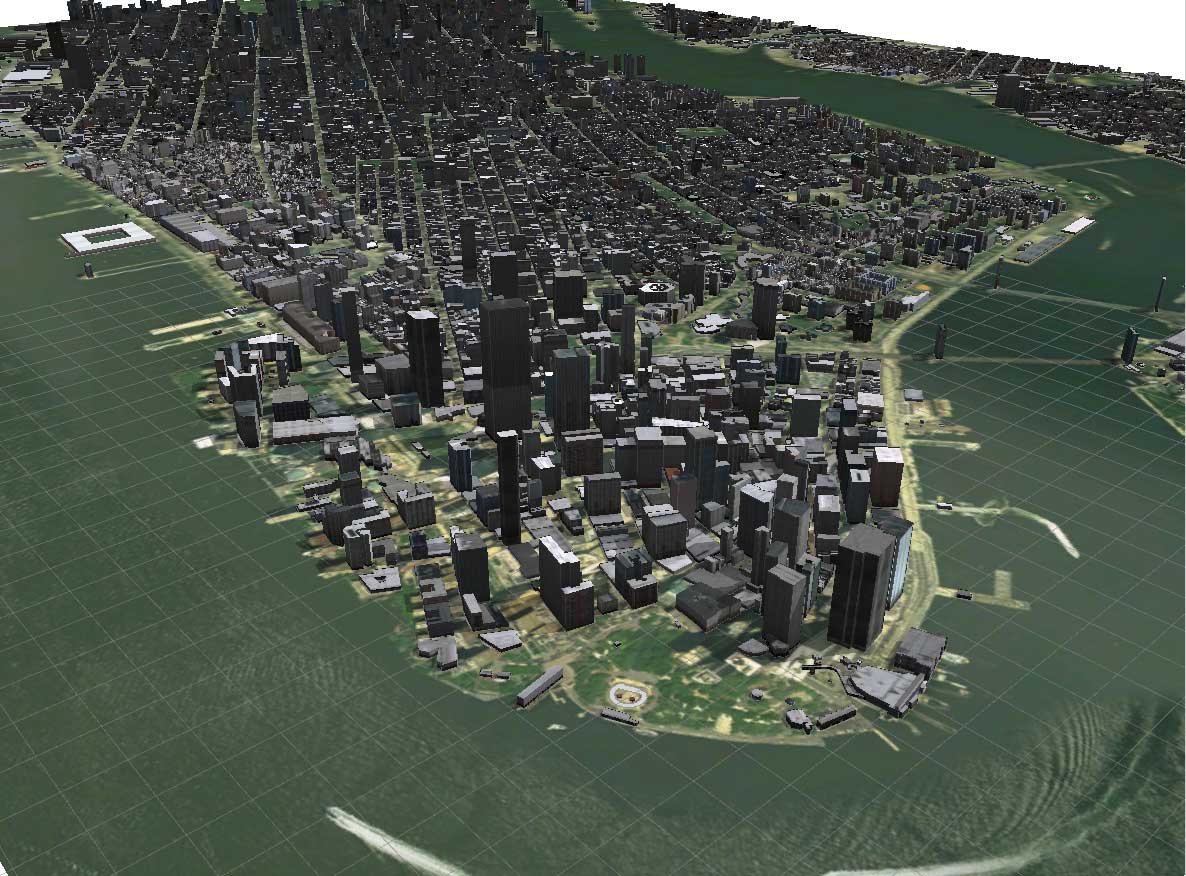
The buildings will automatically be extruded utilizing their attribute data. You can change the appearance of the city with different style types, as well as by changing the visualization from “solid color” to “realistic with façade textures”. This can be edited in the Inspector tab.
Play around with the rule & the data, until you get the look you want. Once you have your scene, you can create different scenarios, export to ArcGIS 360 VR, or even share to the web.
Your data & city are looking great! Happy building.


Article Discussion: