Esri has many users in many different industries using ArcGIS Online, and has always supported users with the ability to locate or geocode their postal addresses and Points of Interest (POIs). However, users are often geocoding locations that are only of interest to them. For instance, a user in the aviation industry might only need to search Airports based on the 3-letter code (e.g. ‘LAX’) or in full textual form (e.g. ‘Los Angeles International Airport’).
Did you know that with the September 2017 ArcGIS Online update, you can now customize your GeoSearch and Geocoding experience to return search results that are relevant to you?
Locator views allow you to configure a view of the Esri World Geocoding service that only returns specific types of locations or only within a specific country or area. Views can be configured for your organization and used by any apps that support GeoSearch, such as Map Viewer, Configurable apps, ArcGIS Explorer, and so on. Additionally, views can also be used for Batch Geocoding.
Prior to releasing the Locator Views capability, users might get false-positive (unreliable) results or incorrect candidates that weren’t exactly matching to their category of interest (e.g. Airports only). On the other hand, some users required geocoding only at the highest location accuracy (e.g. Address level) and didn’t want results at the postal or city level. The Locator Views capability that we recently released as part of ArcGIS Online this September aims to solve these challenges by limiting the search to the Point of Interest category or precision in the geographic extent that the user requires. This helps reduce incorrect results and focuses the search on the area, POI category, and precision of interest to deliver reliable results. Let us walk you through that in 5 easy steps on how this works through a case scenario.
Assume I’m a user in the aviation industry interested in locating just Airports in the USA.
Step 1 – Create a Locator View
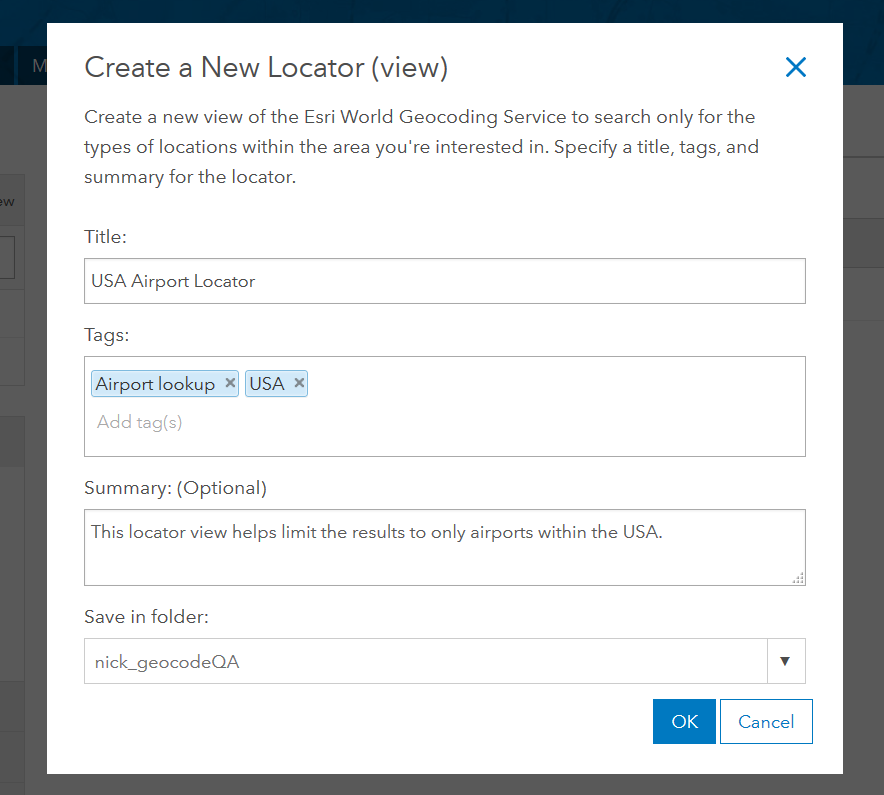
Navigate to your My Content Tab, and create a new “Locator (view)” Item. Fill in the relevant details for the locator view that you want to create to filter your geocoding.
Step 2 – Define the Locator View
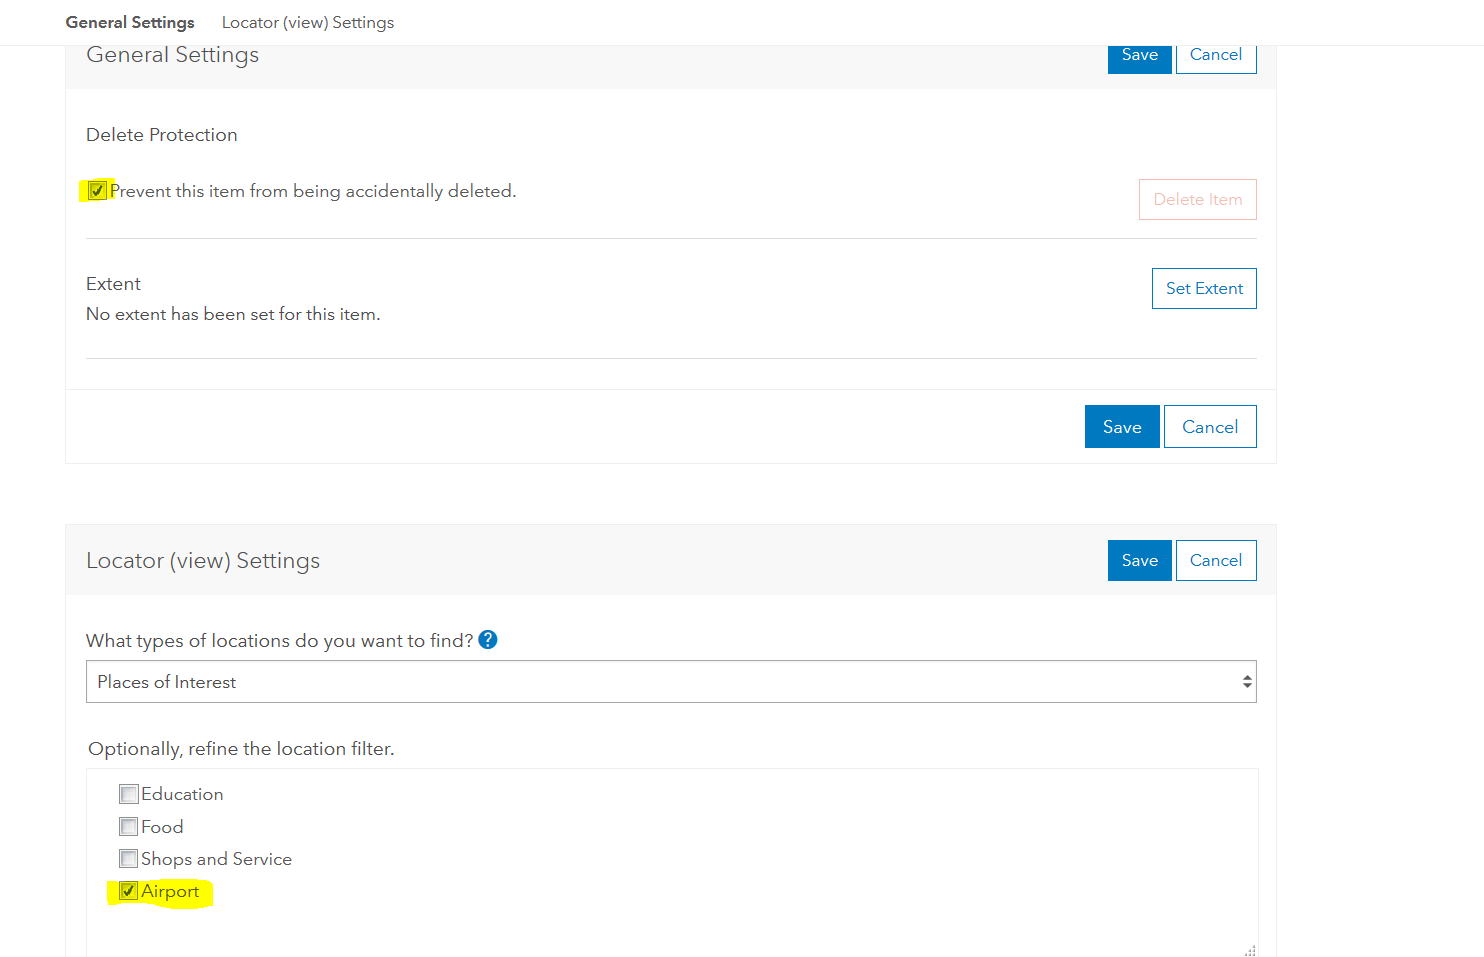
Configure your Locator View to search for only specific types of locations within the area you’re interested in using the settings page for the Locator View item you just created.
You can protect the Locator View item from accidentally being deleted.
Next, you can define the types of locations you want to find, whether it is 1) Addresses, Postal Codes, or Populated Places, 2) Coordinates (e.g. MGRS, USNG), or 3) Places of Interest (e.g. Education, Food, Airport). A complete listing of supported categories and coordinates are provided in the documentation: http://arcg.is/2wigsR3. In this scenario, I will select ‘Airport’ for our Locator View.
Within Settings page, you can define where you want to search for the location type you’ve selected. You can select Anywhere in the World, limited to Select Countries, or define a specific area of interest based on a rectangular extent that you define. I will select the country mode and choose ‘United States’.

Finally, click the save button to update the Locator View item with the settings you’ve selected.
Step 3 – Share the item with your organization
Proceed to the Overview page of the Locator View item and click on the Share button on the right side of the page. You can share this view with your organization.
Next, you can select whether you’d like to share access to the locator with your organization only or share with public. Keep in mind that anonymous users won’t be able to access the organization’s shared locators so if you’re concerned about the locator being used by anonymous users, you can restrict the locator’s use to only within your organization.
Step 4 – Configure it for use
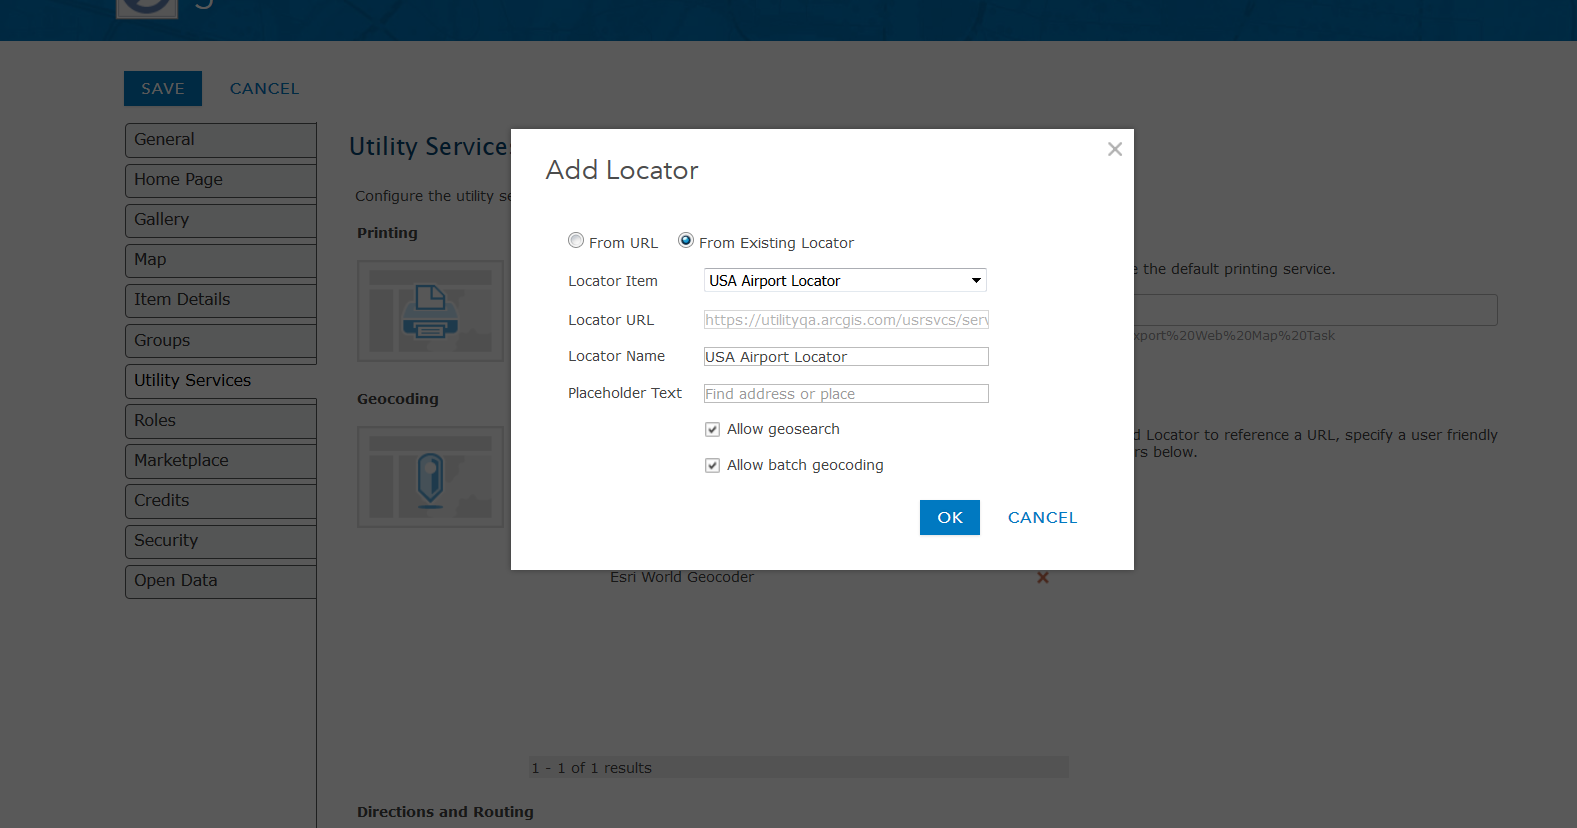
Once it is shared, have your administrator go to the Organization tab, and select Edit Settings, and under the Utility Services menu. The admin can add the USA Airport Locator view that you’ve created.
In this step, the administrator can also limit this locator for GeoSearch only or configure it to allow both, GeoSearch and Batch Geocoding. This is especially important for administrators that want to limit the batch geocoding operation as it consumes service credits, while the GeoSearch does not consume any.
Keep in mind that with batch geocoding, the same service credit rates apply regardless of whether you are batch geocoding through the locator views or through the Online World Geocoding service.
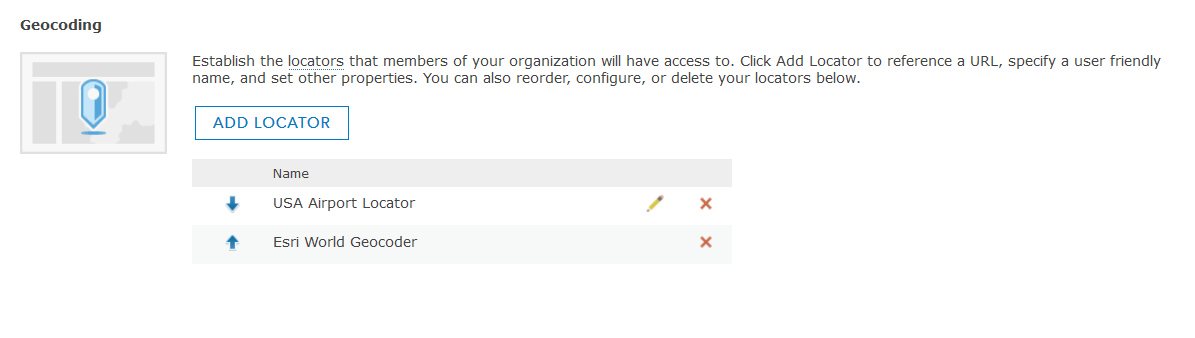
You can adjust the search tree by putting the Locator View on top of the Esri World Geocoder or after it. The benefit of putting it before the Esri World Geocoder is that your search requests will locate to airports first and then through the Esri World Geocoder.
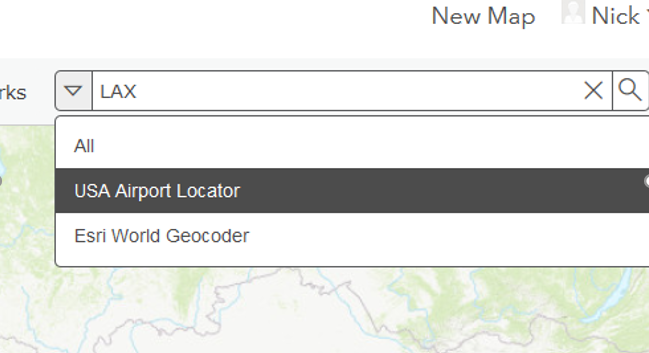
Step 5 – Begin using it!
Your new locator view is all set up. Open the map viewer and select the drop down button in the search pane to bring up the locators you want to search against. You can select the newly created Locator View, “USA Airport Locator” to limit your searches to USA airports.
Also, it is worth pointing out that once the admin configures your newly created locator view in the utility service settings, the locator is available for use in any ArcGIS application that uses the organization’s locators configured in the utility services settings. For example, a user using ArcGIS Maps for Office will be able to geocode against the locator view you’ve created to geocode their airport codes in Excel.
Happy airport searching! Try searching for ‘LAX’ and an international airport such as ‘CDG’ and you’ll notice that only airports in the USA are found with the Locator View you created.
For a link to the full documentation on this feature or for the listing of supported categories, please visit http://arcg.is/2wigsR3
We hope you find this capability useful in your work!
– ArcGIS Online & Geocoding team

Article Discussion: