Existential Introduction
This post will show you how to make realistic-looking fake maps by faking realism over something real, in order to make it look realistically fake. Got it? Let’s do this!
I’m a big fan of using transparency-laden color gradients on hillshade layers to get a subtle realistic textured look without the junk mid-tones. You can while away five to ten minutes of your allotted time on this Earth reading about how to do it in ArcGIS Pro.
But who wants to be subtle and realistic all the time? Life is too short not to make the occasional absurd map.
Big Plaster Museum Relief Maps
Have you been to a museum or visitor center and beheld the sweet sweet massive physical raised relief maps they invariably have in a diorama or mounted onto a wall? Big, heavy, 3D, and awesome. So, let’s take that hillshade color gradient trick, and turn the highlights up to eleven to turn unsuspecting aerial imagery into those plastic/plaster raised-relief maps that we all wish we could touch without getting barked at by security.
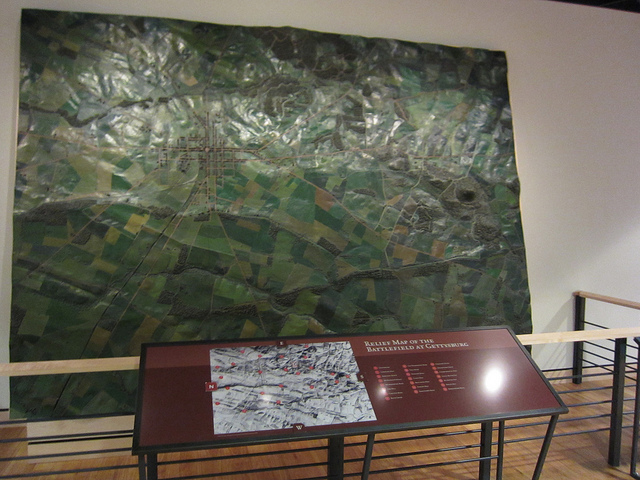
Here’s a photograph of the Cope Map of the Gettysburg battlefield. Emmor B. Cope, a park engineer, created it over 100 years ago.
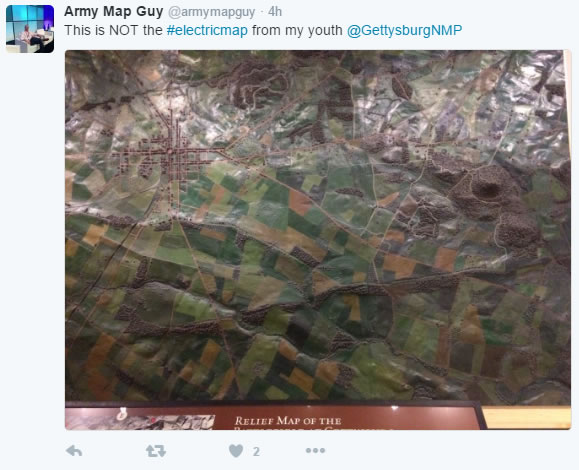
But it wasn’t until I saw Tom Smedley‘s tweet of this map that I thought, “There is no good reason to replicate this in a GIS. Time to give it a shot.”
How To Fake Them
Bold Shadows
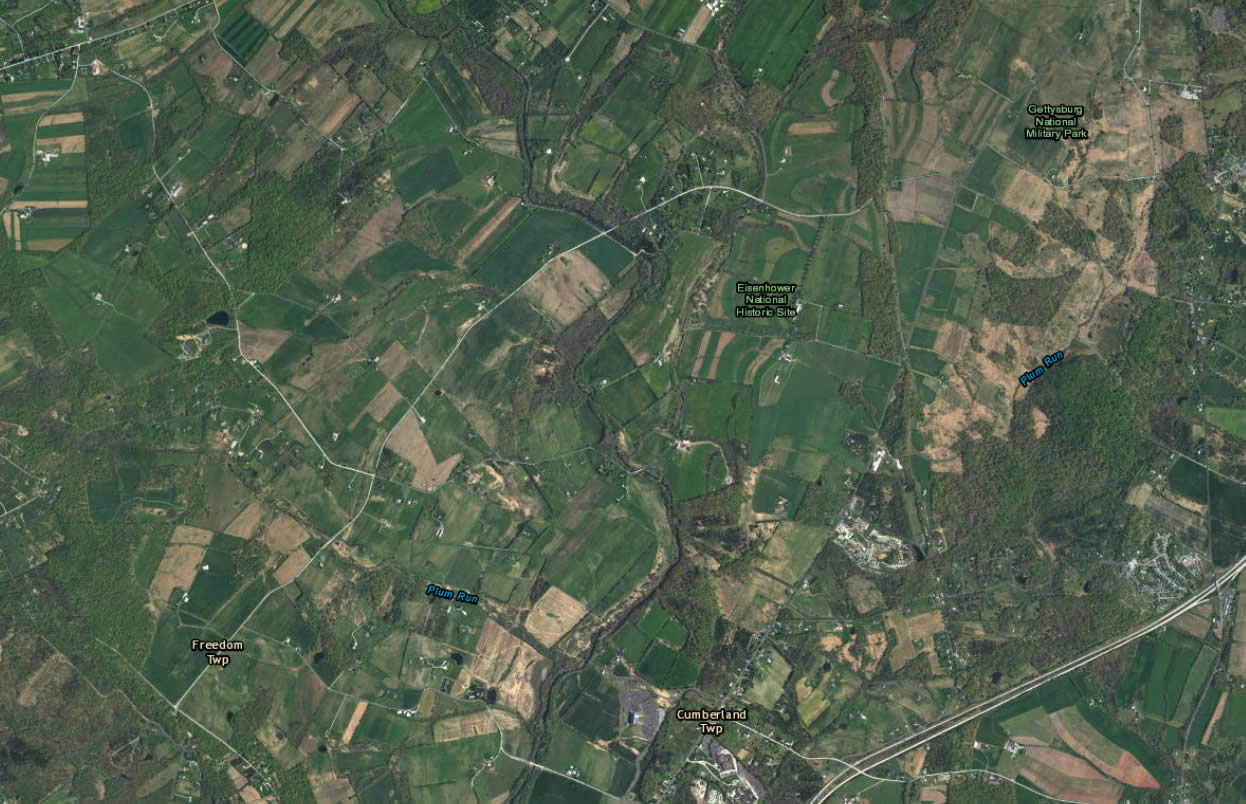
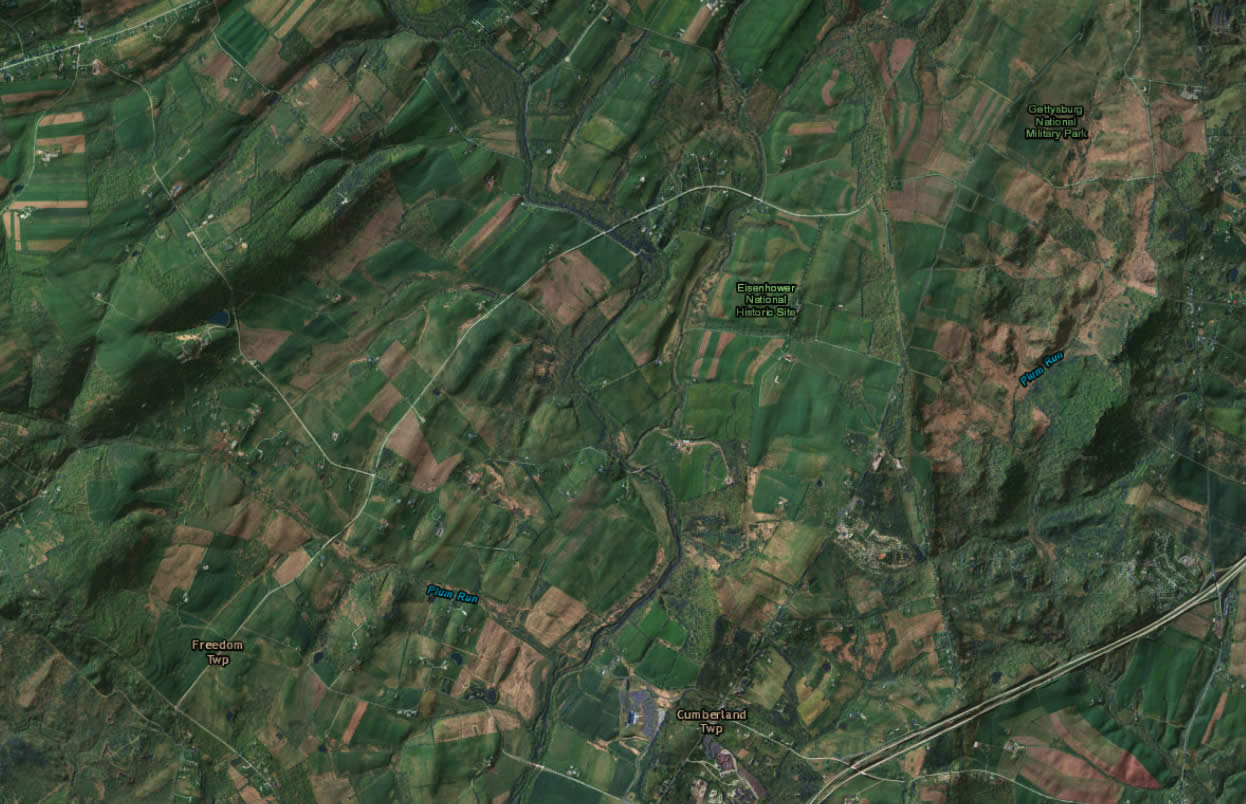
Fire up ArcGIS Pro and choose the “Imagery with Labels” basemap. Here is a snapshot showing the Gettysburg area.
Pull in a hillshade layer from the Living Atlas, and re-color it so that only the shadows have opacity. Set to transparent all other parts of the hillshade gradient (including highlights an mid-tones). This replicates the exaggerated bumpiness of a museum relief map hanging on a dimly-lit wall.
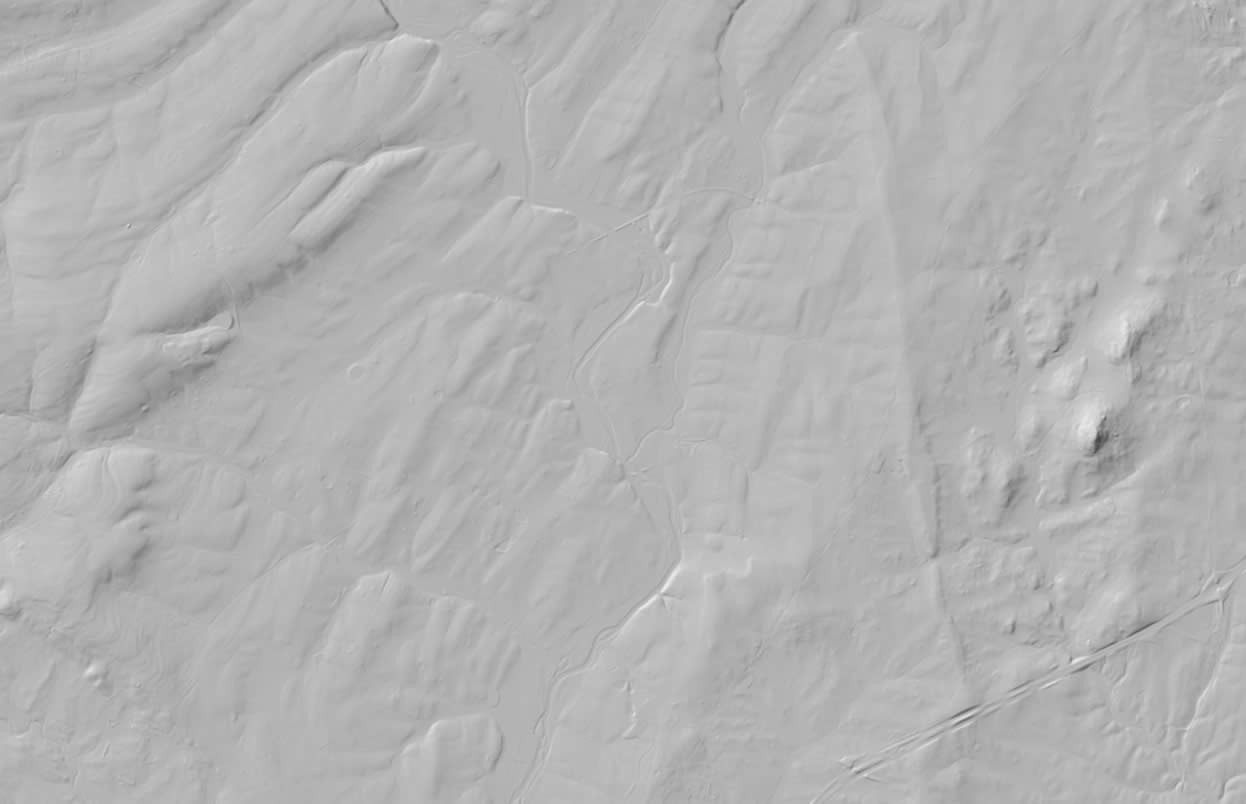
This is what the hillshade layer looks like by default, before changing the symbology’s gradient:
But we want to get rid of all the gray mid-tones and white highlights and really crank up the shading. So open up the hillshade layer’s Color Scheme Editor dialog and tweak the gradient with the luscious magic enabled by transparency support in ArcGIS Pro.
How do you get to that dialog? Within the hillshade layer’s Symbology menu, expand the Color scheme droplist, then choose Format color scheme. And put on your mad scientist goggles.
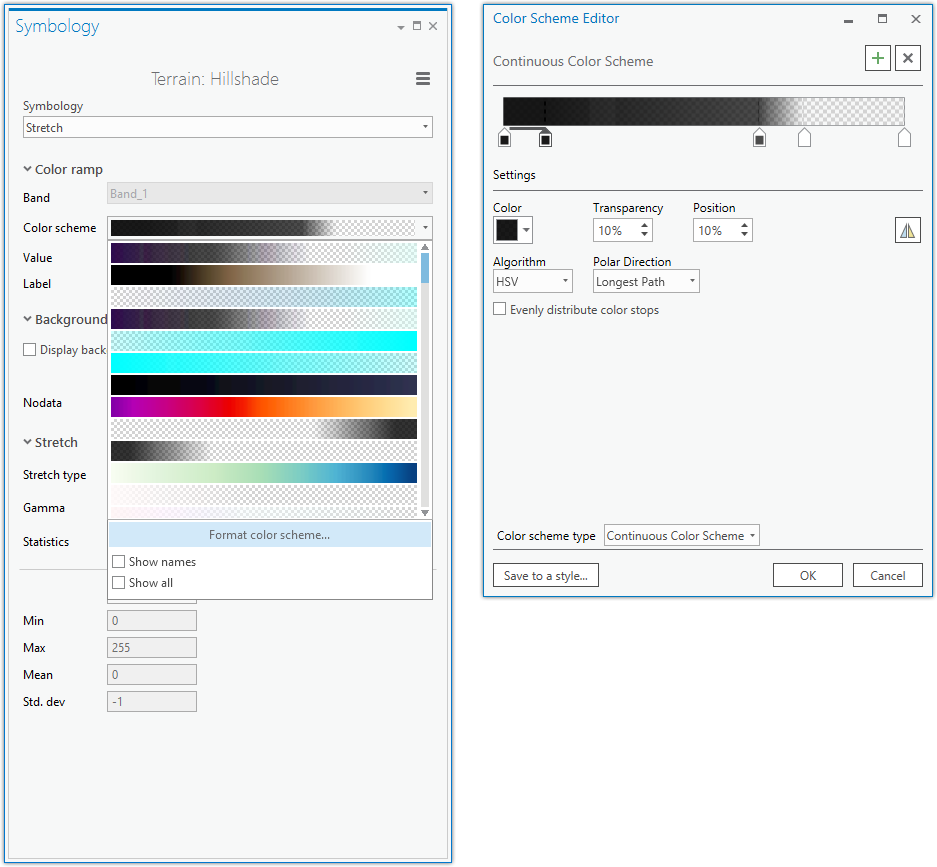
Here’s a close-up of the shadow-y color scheme I cooked up:

Here are the specifics, if you want to re-create it:
Color | Transparency | Position
#000000 | 10%  | 0%
#000000 | 10%  | 10%
#000000 | 30%  | 65%
#000000 | 100% | 75%
#000000 | 100% | 100%
And here’s how it looks on top of the imagery after the gradient magic:
Garish Lighting
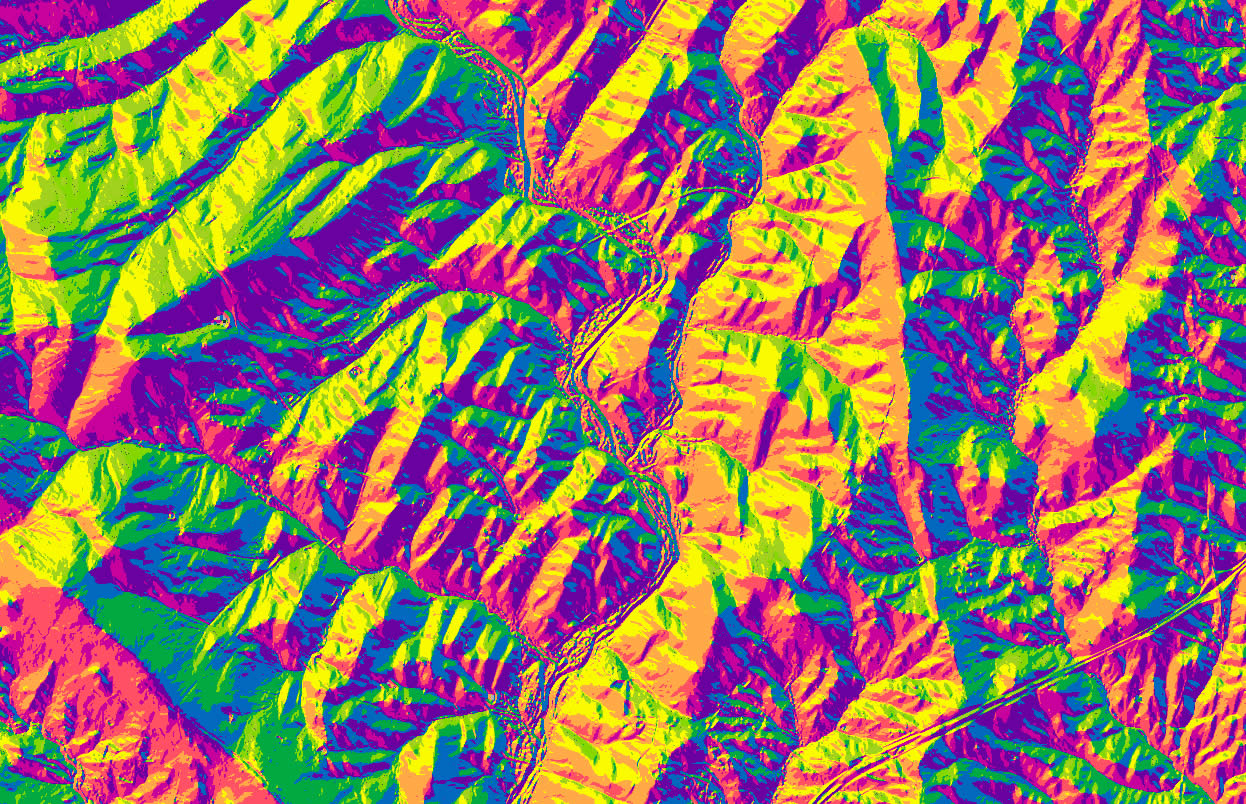
Probably the most tactile quality of these raised relief maps is their reflective surface within stark visitor’s center lighting conditions. So I searched the Living Atlas for an aspect layer and added it to my project. Aspect is an image overlay derived, like hillshade, from a Digital Elevation Model. It colors pixels by what geographic direction the surface happens to be facing. Pretty cool, right? GIS frequently blows my mind.
The default symbology of this aspect layer uses very bold hues:
Using the Color Scheme Editor once more, paint Northwest-facing sides white, and fade to fully transparent in the other directions.
Here is a close-up of my color gradient:

Hard to tell what’s going on from that image. So here are the specifics, if you want a head-start on making your own reflection effect:
Color | Transparency | Position
#FFFFFF | 100% | 0%
#FFFFFF | 100% | 70%
#FFFFFF | 80%  | 80%
#FFFFFF | 60%  | 84%
#FFFFFF | 60%  | 86%
#FFFFFF | 80%  | 90%
#FFFFFF | 100% | 100%
Check it out! Now that rainbow aspect layer has been hijacked to look like a spotlight illuminating a confoundingly realistic-looking raised relief map. Pow!
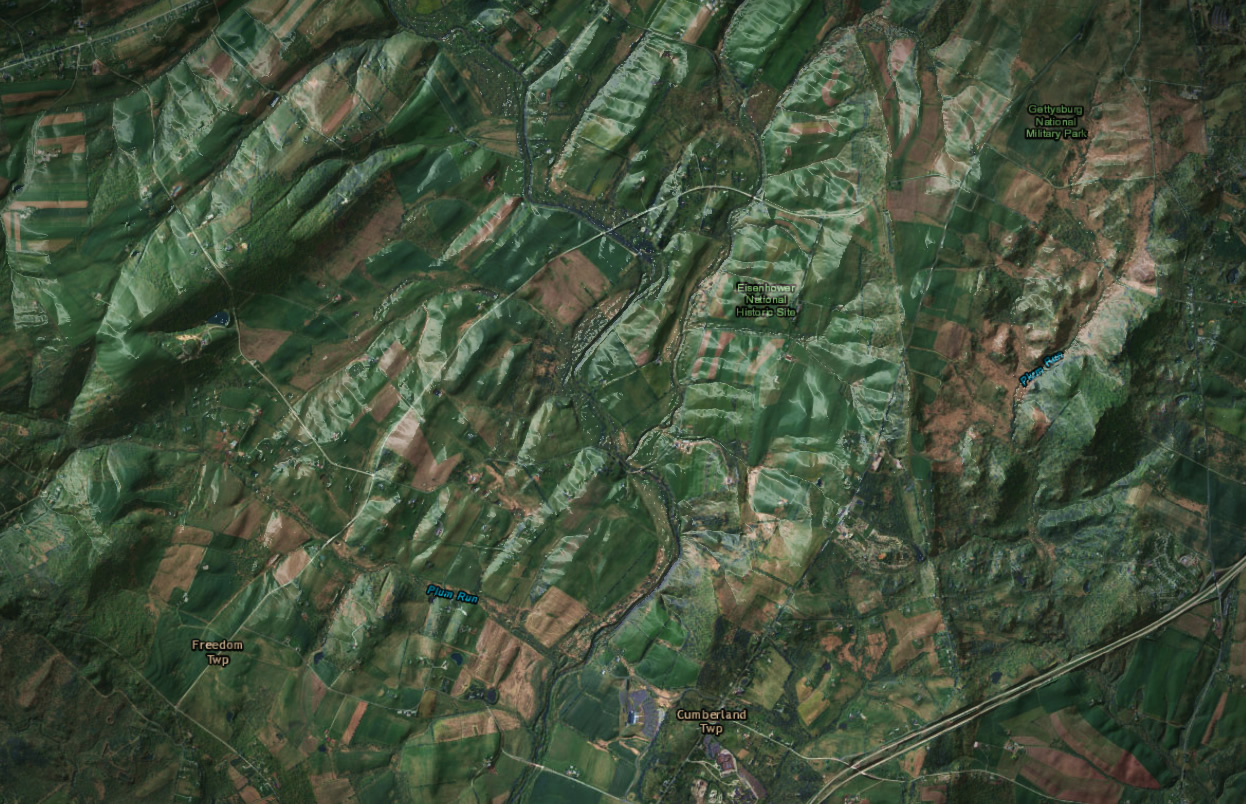
That’s it. A silly way to make real imagery look fake, and therefore real, by making it look like fake imagery trying to look real. Yes.
Couple tips: Render the hillshade and aspect layers on top of any label layers, so the labels look like they are painted onto the surface and also impacted by the lighting conditions. I also added a vignette, because that’s what happens in real life when you take a picture of a surface like this in lighting conditions like this. You can create vignette effects for your maps by adding a rectangle over the layout and then playing with the fill settings.
I leave you with this before/after animation:

Happy reality through fakeness mapping! John

Article Discussion: