What is an Elevation Layer?
Elevation layers can help with 3D visualizations by creating relief in your 3D scene. Elevation layers are composed of data coming from LIDAR, photogrammetry, spot, or contour sources. The raster elevation model you create from elevation data sources can then be used to publish your elevation layer. Elevation layers can be used as a surface that provide base heights for other layers in your scenes. You can leverage your hosted elevation layers in ArcGIS Online along with from Esri-provided world elevation layers that covered land terrain and ocean depths. Elevation layers could also be published to an on-premise ArcGIS Server.
We initially introduced support for publishing hosted elevation layers to ArcGIS Online back in July 2016. These elevation layers can be used across the platform in applications like Scene Viewer, ArcGIS Pro, web applications using the 4.x JS API and in ArcGIS Earth. This blog is an update to that July 2016 release because publishing just got easier!
How to Publish a Hosted Elevation Layer to ArcGIS Online
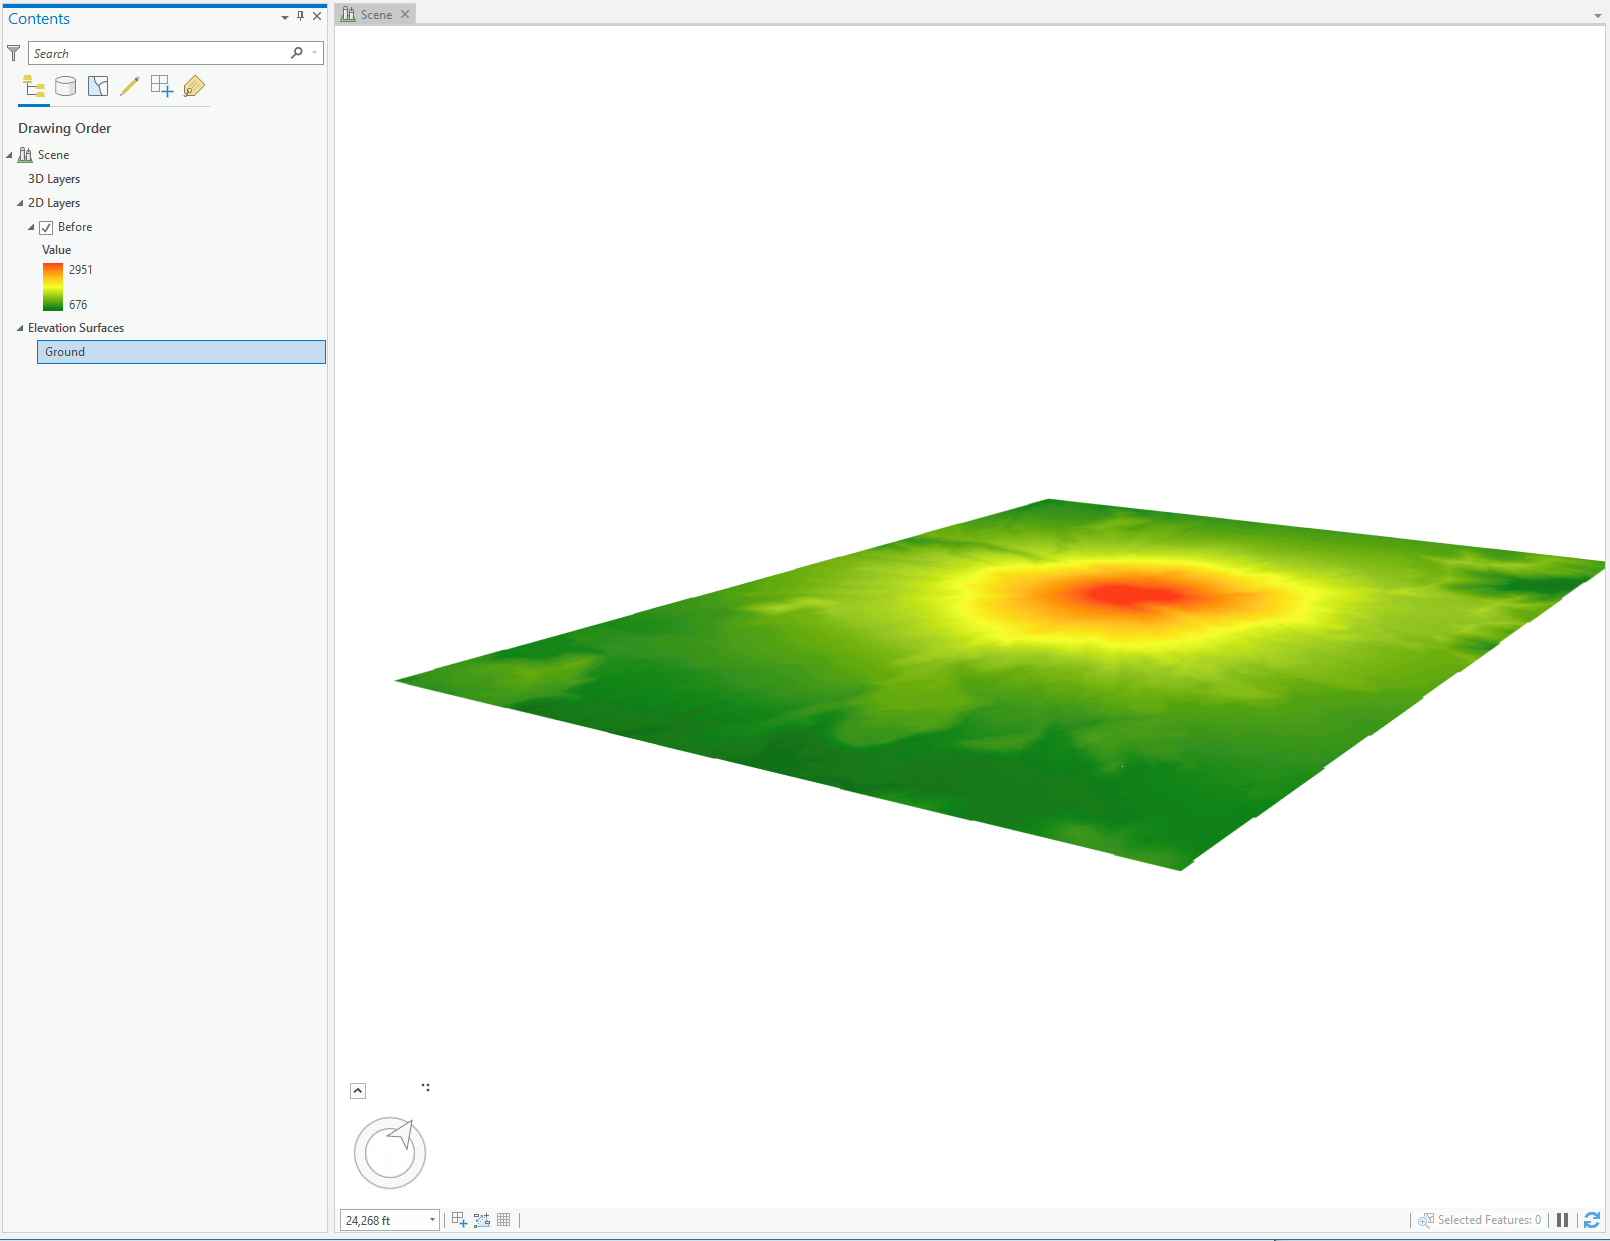
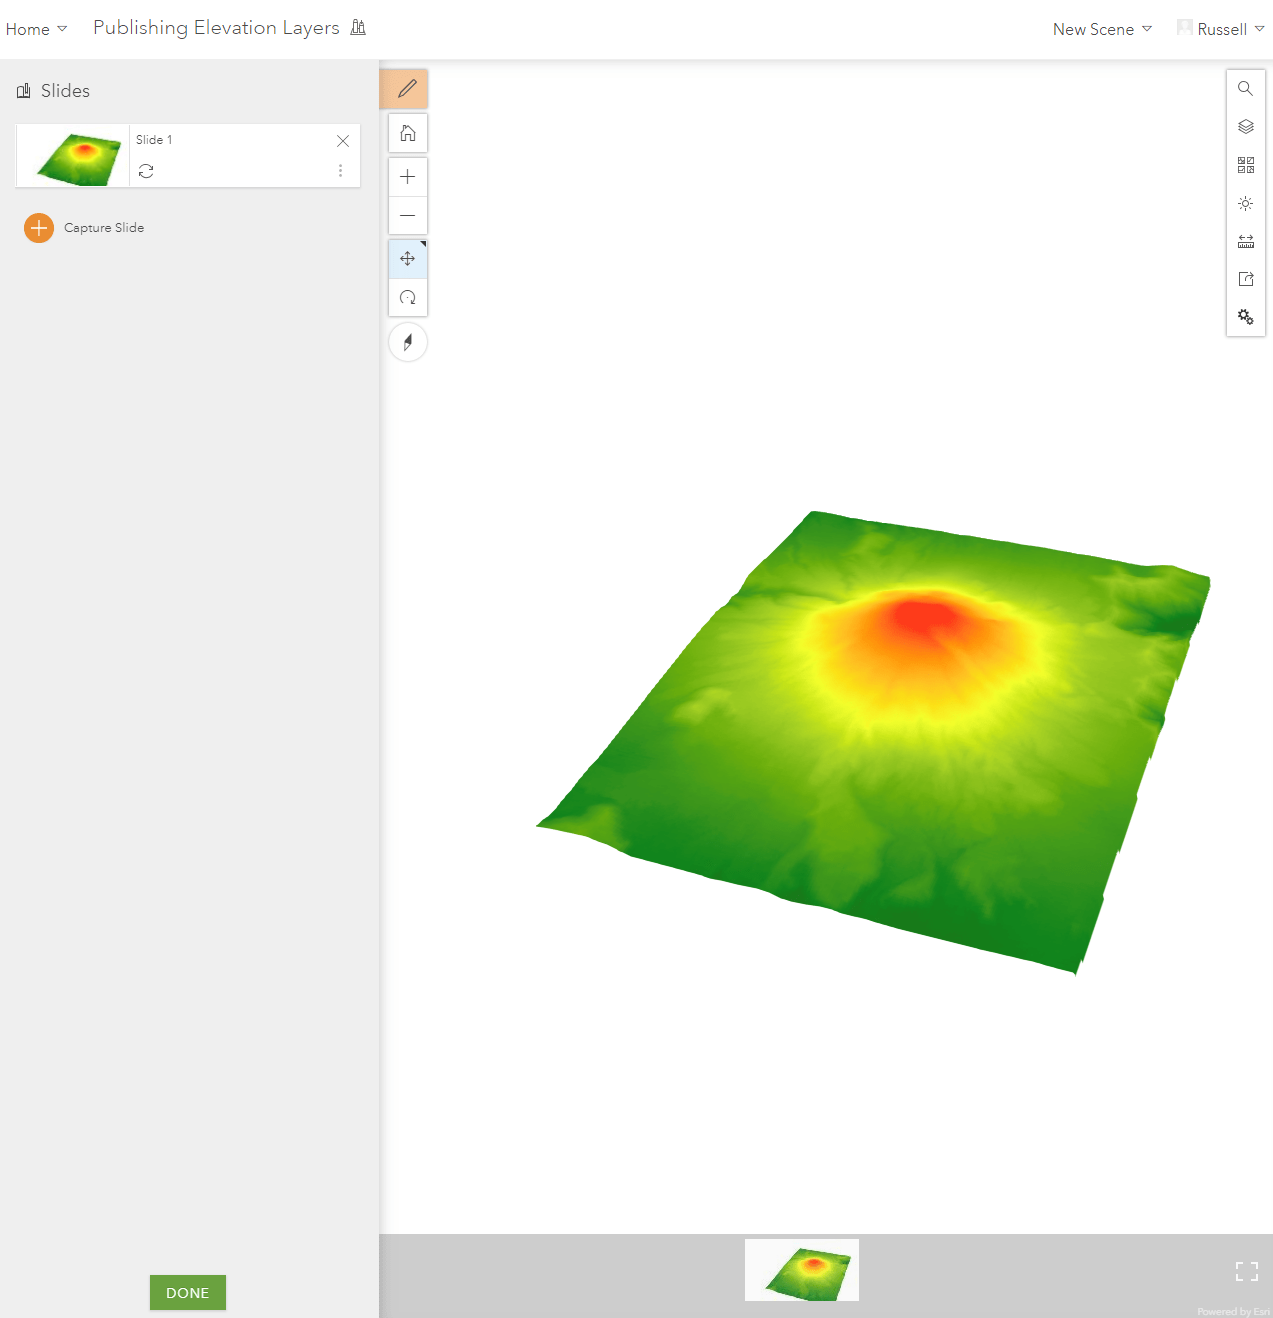
In 1980 Mount St. Helens erupted and drastically changed the landscape of the area. I am going to use historical elevation data from the USGS and publish it to ArcGIS Online to create a hosted elevation layer. We can then see an example of what Mt. Saint Helens would have have looked like before that massive eruption.
ArcGIS Pro 2.3 has made publishing hosted elevation layers to ArcGIS Online even easier. You no longer have to publish the elevation layer separately from your scene and use GP tools to generate a tile package. Everything can now be published with one click.
To begin I have an empty scene but you can also start off with the supplied map package provided here. In the scene I removed the Esri provided world elevation and basemap layers. I did this to help keep focus on the layers being published in this blog.
I then added the raster named “Before” to the scene and have the scene clipped to the extent of the data. Having this operational layer added will help give reference to the elevation layer we are publishing. I also adjusted the color ramp used from a grayscale to green-red color ramp.
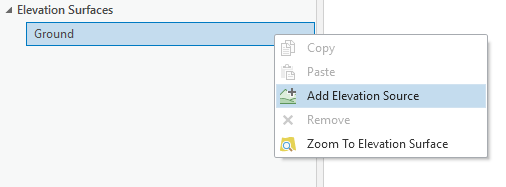
Next add the elevation data to the scene. In this sample it is the same data that is under the 2D Layers section of the Contents pane. Right click on Ground under Elevation Surfaces and click Add Elevation Source to add the the elevation data to the scene.
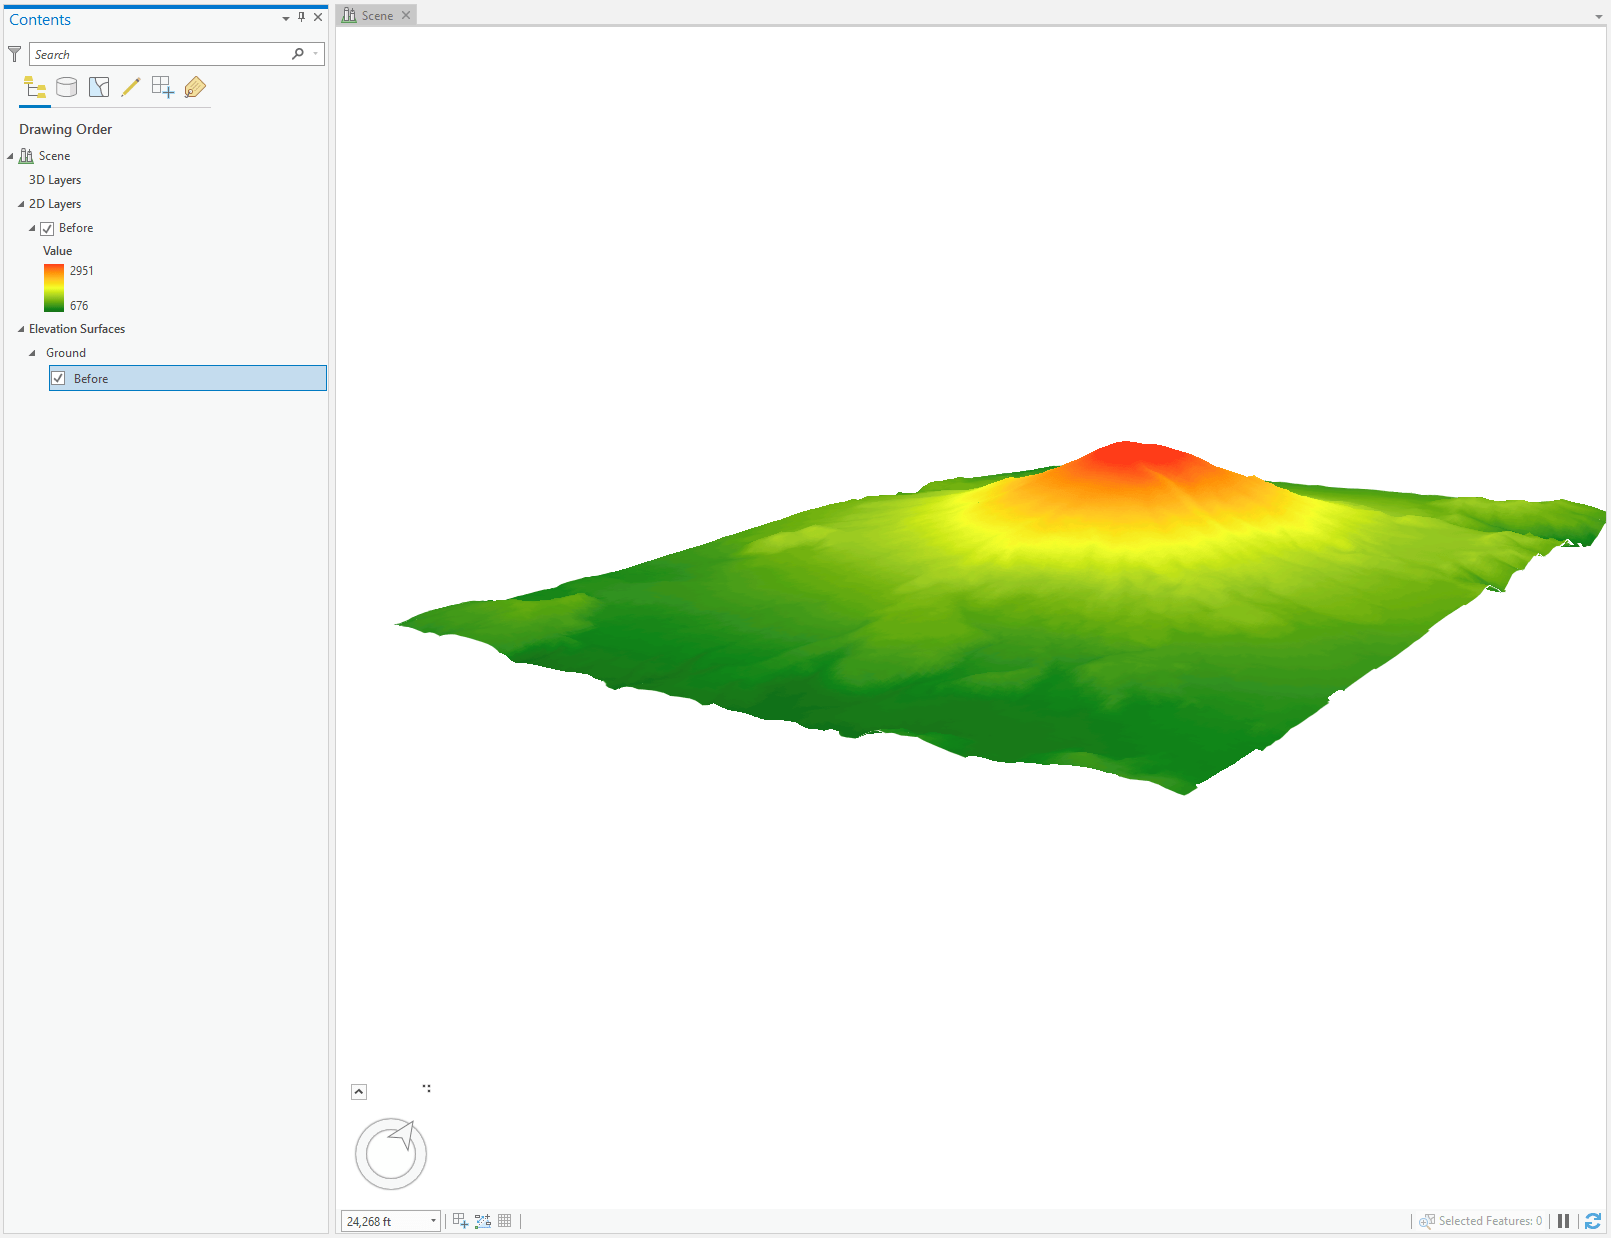
Now we can see the elevation data and raster data in the scene and we can now see what Mt. Saint Helens looked like prior to the massive eruption.
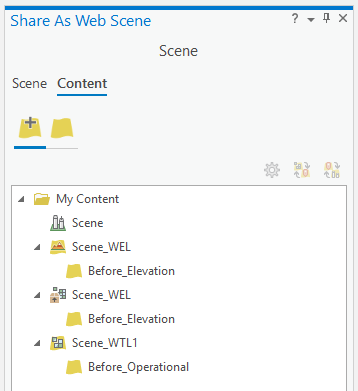
With all the layers added to this scene we can begin publishing a web scene and its layers to ArcGIS Online. With ArcGIS Pro 2.3 all you need to do is go to the Share tab, click on Web Scene and under the Share as a Web Scene pane we can see all the layers being generated when we share to ArcGIS Online.
ArcGIS Pro will auto-suggest the level of detail for the elevation and tile layers. You can adjust the level of detail by right clicking on the layers being published and clicking on Configure Web layer properties. Here I adjusted the elevation layer level of detail down to level 19 and the same for the tile layer created. Once the layer properties have been configured click on Share and the packaging and publishing process will begin.
Viewing your web scenes in the Scene Viewer
Now that the web scene and layers are all published to ArcGIS Online we can now view them in Scene Viewer. I can open the web scene by clicking on the link provided in ArcGIS Pro or open the web scene from the item located under My Content in ArcGIS Online.
Even though the web scene was created in ArcGIS Pro I can also make changes to this web scene in Scene Viewer. I can adjust the background of the web scene to just white so I see no blue sky in the horizon when I tilt the camera. I am also going to add a few slides to each this web scene to help viewers navigate my web scenes that might not be familiar with navigating in 3D. To create slides simply click on the Slides button in the Designer Pane, then click Capture Slide. This will save the current view you have in the scene. Once all the slides are captured just click Save to update the web scene.
Using Web Scenes with a 3D Template
In ArcGIS Online there are web apps available that can leverage our 3D web scenes to assist with visual analysis, comparisons and basic viewing. I am going to use a simplified viewing template to share the web scene out to my user group. To create this web app click on the share button in Scene Viewer and click on Create Web App button. I now have an OOTB solution to share out to my organization or publicly across ArcGIS Online and you can check it out below embedded in this blog.


Commenting is not enabled for this article.