Sharing content privately between organizations is a powerful feature of the ArcGIS platform. You can share any item, including data, layers, maps, scenes, and apps, with specific members from a different organization without having to share the content to the general public. This is done by sharing via groups. A group is a collection of items which can be used to organize content thematically or, in this case, to share content with others.
The steps below detail how to share content privately between organizations. In this scenario, the city of Redlands ArcGIS Online organization is sharing utility data with the county of San Bernardino ArcGIS Online organization. The data is not available to the public; only group members from Redlands and San Bernardino are able to access the data. Organization members which are not in the group are not able to access the group’s content.
Here are a few things to consider before creating your group:
- Which organizations need to participate? You can have members from multiple organizations participate.
- Which organization will create the group? The organization that creates the group effectively owns the group and controls its members and content.
- Identify the actual members that will participate in the group. You will need to invite members to join the group. All members must be part of an organization; no public accounts.
- Members retain ownership of the items they share to the group. Items can’t be modified in any way by other group members.
Step 1: Create a group
The first step to sharing content privately with another organization is to create a group. An organization member from the city of Redlands creates the group which is used to share content with the County of San Bernardino. In this scenario, the city of Redlands, the organization that owns the data, also owns and manages the group. However, the County of San Bernardino could instead own the group and the City of Redlands share its data with the group. Both options are perfectly acceptable; it primarily depends on which organization should control group membership and content.
The group creator must have the privileges necessary to create a group. An administrator can also create the group and invite members who can then contribute content. In addition to specifying tags, a title, and a description of the group, you also configure the group status to make the group discoverable by the public, only within the organization, or keep it private. If the group is public, anyone can discover the group. However, this does not mean they can see or discover the group’s content. When the group is available to the organization, this means members of your organization can discover it but they cannot see the group’s content unless they are a member of the group.
Finally, you have the option of allowing all group members to share items with the group. In the Redlands example, group members are able to contribute to the group. However, you may configure the group such that only the group owner is able to share items with the group.
Note: Administrators in the organization that own the group are able to see all items in the group, even if not a member of the group and the content is owned by members from a different organization.

Step 2: Invite others to join the group
Once your group has been created and configured, it’s time to invite other group members. You can search for the members of both organizations that need to be in the group.

You can invite users from as many other organizations as needed. You can create a group that consists of only your organization and one other organization, or you can share content privately with multiple organizations at the same time. As always, you can invite users from your own organization as well.
Users invited to join the group will see a red notification alert next to their profile name:

When the notification alert is clicked, the user’s notifications are displayed and instructions provided:

When inviting users from other organizations to your group, keep the following information in mind:
- The profile of users from other organizations must be public. If their profile isn’t public, they won’t be searchable when inviting users to join the group. Once invited, they can revert their profile to non-public if necessary. If their profile cannot be made public, your group can be configured as public and allow others to request members. With this approach, potential group members can request membership to your group without having to make their profile publicly available. Once the group has been joined, you can change the group from being public to private without impacting the group members or the content shared with the group.
- Be sure to uncheck the option to only search for members from your own organization (shown above as “Only search for members in City of Redlands”).
Step 3: Share content!
As soon as the group is created, you as the group owner, can begin sharing content with it. If you allowed group members to contribute, they can begin sharing and using the content in the group as soon as they join. While group members can access the group’s content, they cannot change the sharing level of items they do not own. For instance, if a group members creates a web map or app using a feature layer they do not own and try to share the map publicly or with others, they cannot change the sharing level of the feature layer.
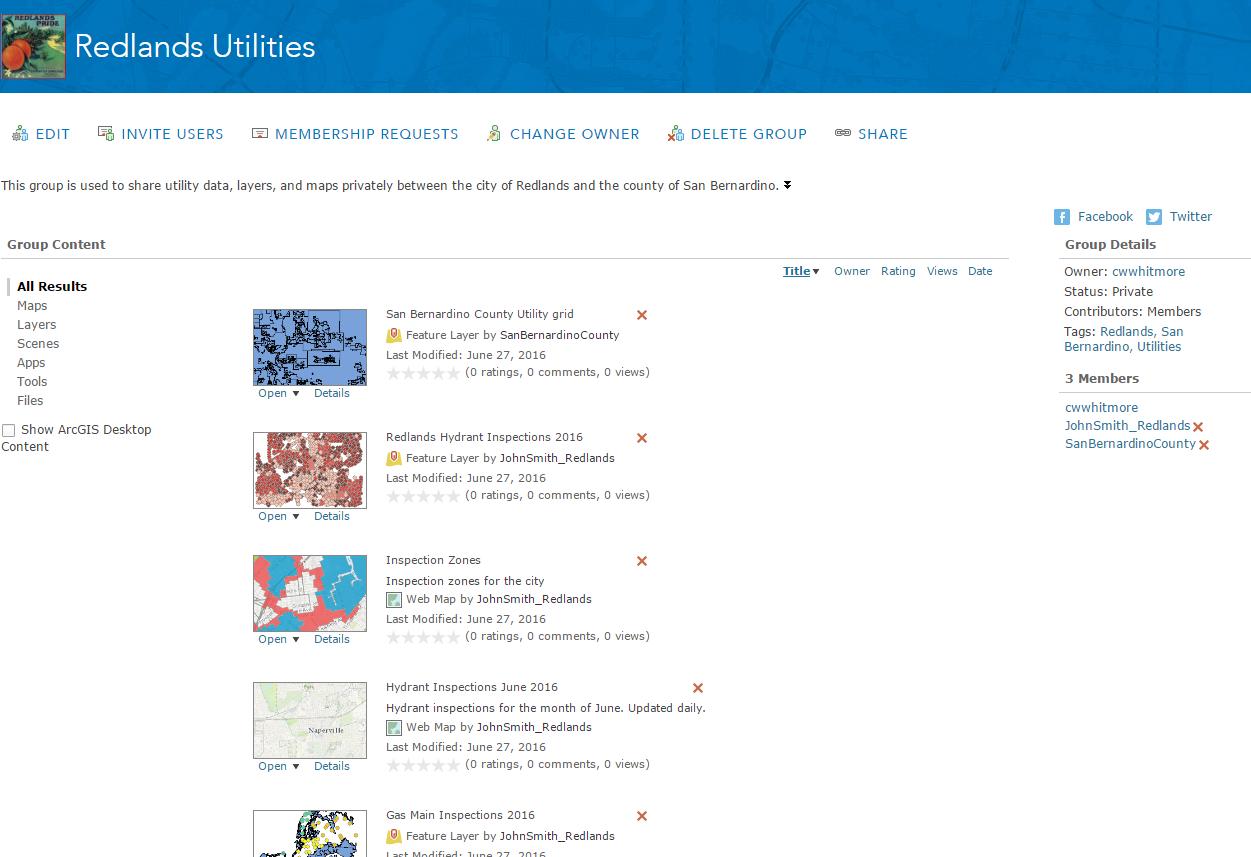
In the Redlands utilities example, all group members are able to contribute to the group. Both the city of Redlands and the county of San Bernardino can share content with the group. Redlands will be sharing city level utilities data, while San Bernardino will be contributing county level data and working with the Redlands data.
To share layers, maps, apps, and other items with your new group, go to the details page for the item you wish to share and select the group you created in step 1. You may also share the item with the organization, as well as any other groups. This will vary, depending on the specific needs of your organization or the project.

Once the group has been configured, you can return to the group itself at any time and manage it as needed. Whether that is adjusting group status, changing title, description, or tags, or adding or removing members, you are always able to manage the group based on your evolving needs.
You can change the group configuration at any time. For instance, you may want to only allow the group owner to contribute initially and then later allow all other group members to contribute. Or an administrator can create the group, share content with the group, and then change ownership of the group and content to the project leader. You may also need multiple groups to share certain content with multiple organizations, while you have other related content you only want to share with one organization.
Stay tuned for improvements to sharing and collaborating between organizations!

Article Discussion: