Note: This blog article covers the classic Esri Story Maps which are in mature support and scheduled to be retired in late 2025. Story authors are strongly encouraged to use the new ArcGIS StoryMaps to create stories.
For more information about transitioning to the new StoryMaps, see ArcGIS StoryMaps resources. For more information about the transition from classic Esri Story Maps to the new ArcGIS StoryMaps, see Esri Story Maps: Now in mature support.

A web scene allows you to visualize and analyze geographic information in an interactive 3D environment. Using ArcGIS Pro you can author and publish scenes. Scenes can also be authored and viewed using the Scene Viewer, a built-in ArcGIS Online application.
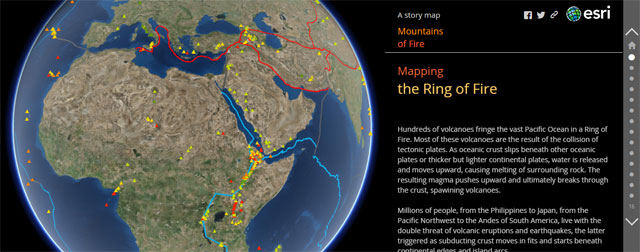
A scene may make an interesting addition to your Story Map, or it may even be essential to telling your story completely. Shown below is Mountains of Fire, a Story Map Journal that includes scenes.
Scenes can be added to your story map using the scene viewer, here’s how.
*
Using the Scene Viewer in Story Maps
Scenes can be viewed using the Scene Viewer in desktop web browsers that support WebGL. Note that scenes are not currently supported on mobile devices, and subsequently web scenes in story maps used on mobile devices are not supported. For more information see Scene Viewer requirements.
When using the Scene Viewer, a complete set of tools is available to select basemaps, control the environment, toggle layers, search, and if logged in, edit and modify the scene. The Scene Viewer also includes UI options to navigate within your organization.
In the context of a story map these tools and UI elements are not needed, nor desirable. They can be omitted by minimizing the Scene Viewer UI, a recommended best practice whenever displaying scenes using the Scene Viewer in story maps. You can add any web scene to a story map using the minimized Scene Viewer URL.
For example, the URL below opens the Scene Viewer in its normal configuration:
http://www.maps.arcgis.com/home/webscene/viewer.html?webscene=3e0a9746178e43688875720f9a9fa4c3
The following URL opens the Scene Viewer with its UI minimized by adding &ui=min to the end of the URL:
*
Adding scenes to Story Map Journal
Story Map Journal is ideal when you want to combine narrative text with maps and other embedded content. A Map Journal contains entries, or sections, that users scroll through. Each section in a Map Journal is composed of a primary viewing area, or Main Stage, plus a side panel that can include text and other media.
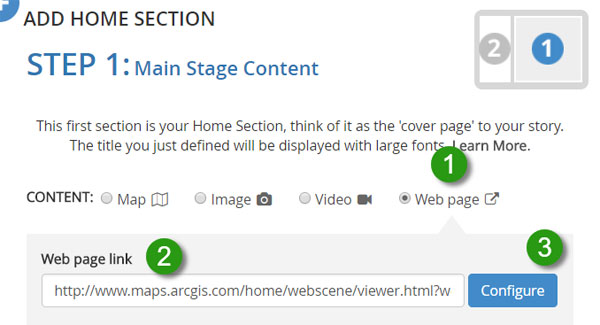
To add a scene to the Main Stage of your Story Map Journal, open the scene in the Scene Viewer using the minimized UI described above, then follow these steps:
Step 1. In Main Stage Content choose Web page.
Step 2. Under Web page link, paste the Scene Viewer URL with minimized UI.
Step 3. Click Configure.
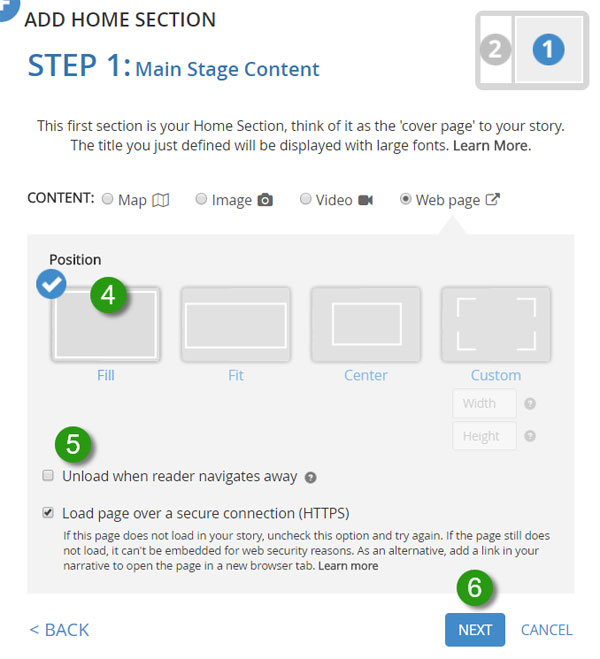
Step 4. To ensure the scene fills the entire Main Stage, choose Fill (the default) as the position.
Step 5. Uncheck Unload when reader navigates away. Unchecking this option ensures the scene does not have to reload if the section is visited again. This is optional, but highly recommended, since the scene only needs to load once while the story map is viewed.
Step 6. Click Next to continue authoring your Story Map Journal.
*
Adding scenes to Story Map Series
Story Map Series lets you present a series of maps and media via tabs, numbered bullets, or a side accordion. To add a scene to your Story Map Series, choose the desired layout option, then follow these steps. Note that these steps are very similar to what is used for the Story Map Journal.
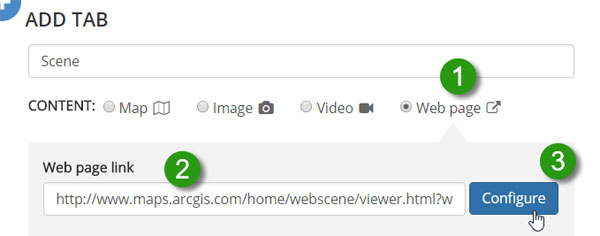
Step 1. Depending on the Story Map Series layout you’ve chosen, you will be adding a tab, bullet, or entry. In Content choose Web page.
Step 2. Under Web page link, paste the Scene Viewer URL with minimized UI.
Step 3. Click Configure.
Step 4. Choose Fill as the position (the default).
Step 5. Uncheck Unload when reader navigates away. Unchecking this option ensures the scene does not have to reload if the section is visited again. This is optional, but highly recommended.
Step 6. Click Add to continue authoring your Story Map Series.

*
Adding scenes to Story Map Cascade
Story Map Cascade lets you combine narrative text with maps, images, and multimedia content in an engaging, full-screen scrolling experience. The app is composed of sections containing narrative text and media, such as images, web map and web scenes, videos, or other web content. Scenes can be added to Media or Immersive sections, but in general Immersive sections will provide the best results.
To add a web scene to a Story Map Cascade Immersive section, follow these steps:
Step 1. Add an Immersive section.
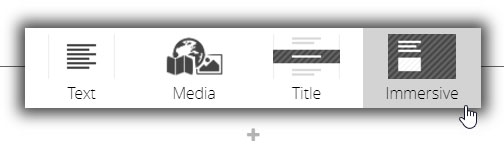
Step 2. Click Add media

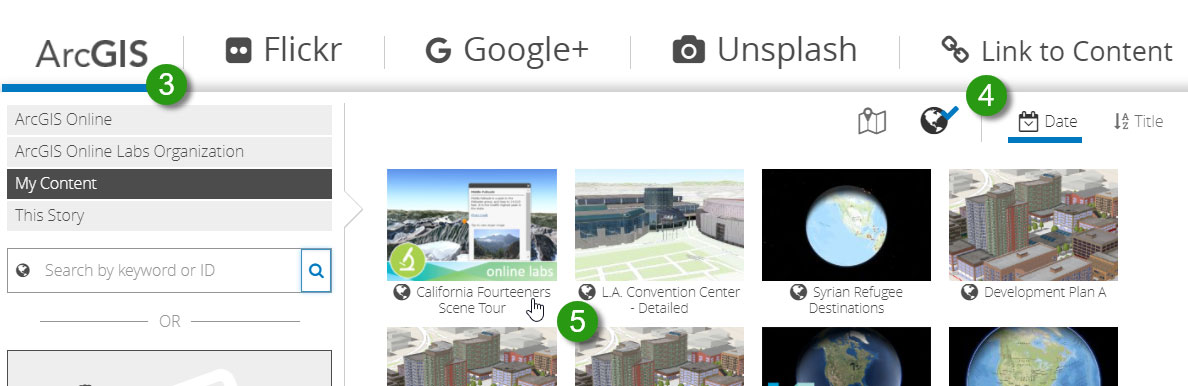
Step 3. Choose ArcGIS, and optionally choose to search My Content or elsewhere for the scene, and enter a search string.
Step 4. Click the globe icon to filter for scenes.
Step 5. Click the scene you want to add. The scene is automatically added with a minimized UI.
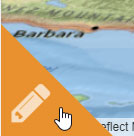
Step 6. Click the pencil in the lower left of the section while in edit mode to choose additional options for the scene for, and how it behaves within your Cascade.
*
For more information:
- View scenes in Scene Viewer
- Scene Viewer requirements
- Make your first scene
- Mountains of Fire ( a Story Map Journal using web scenes)
- Story Map Series overview
- Story Map Journal overview
- Story Map Cascade overview
This post was originally published on March 20, 2015, and has been udpated.

Commenting is not enabled for this article.