You can publish your maps and data as hosted web layers on ArcGIS Online. These hosted services come in two types: feature layers and tile layers. Tile layers support fast visualization of large datasets using a collection of predrawn map images, or tiles. See About hosted web layers for more information.
ArcGIS for Desktop allows you to build tiles for a map document and store them in an easily transferable tile package (.tpk file). You can share a tile package on ArcGIS Online and publish it as a hosted tile layer. This workflow allows you to build tiles using your own computing power, rather than your ArcGIS Online credits, so is a very economical way to create hosted tile layers for your mapping needs.
Follow these steps to create and publish tile packages using ArcGIS for Desktop. Note that you will need publish privileges in your ArcGIS organization to publish the hosted layer. See Organizational roles and Role privileges for more information.
Create tile packages using ArcMap
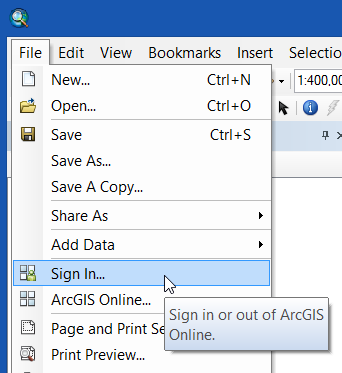
Step 1. Open ArcMap and sign in to your account if you have not done so already. Click File, then Sign In…
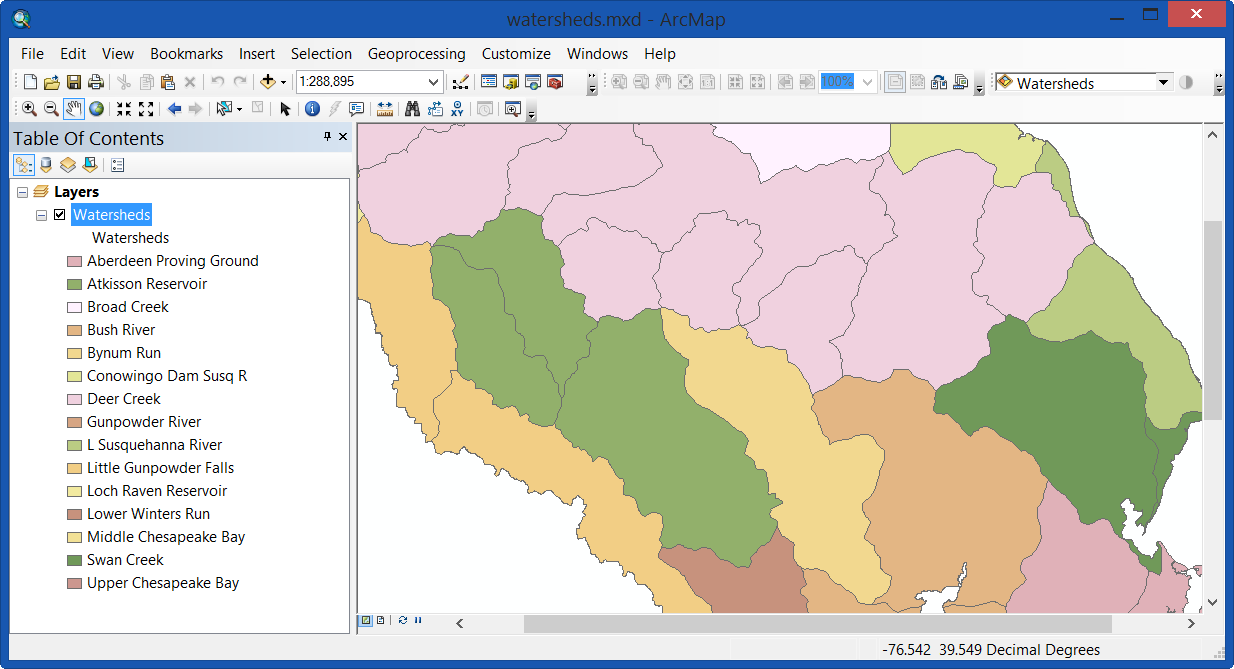
Step 2. Author the map as you want it displayed in the hosted layer.
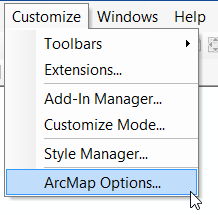
Step 3. Enable Share As Tile Package. The option to Share As Tile Package will not be available unless you have enabled the ArcGIS Runtime tools. In the Customize tab, choose ArcMap Options…
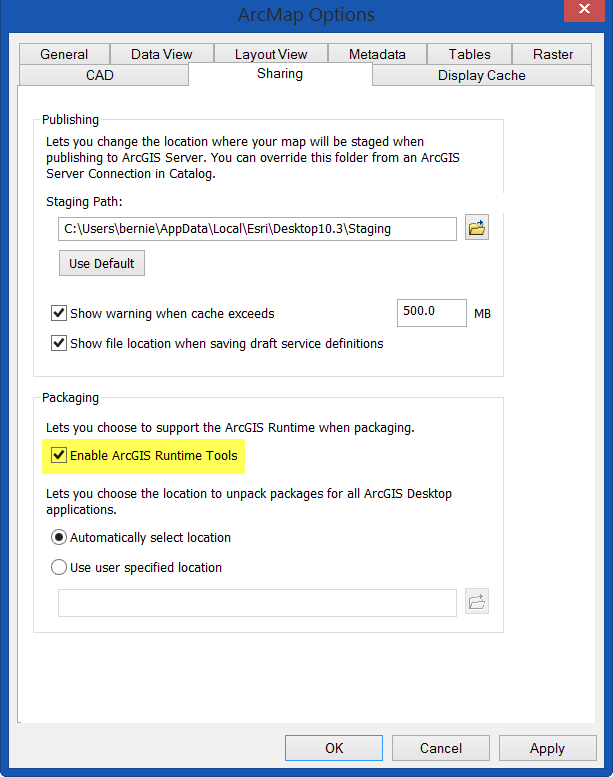
In the Sharing tab check the box to Enable ArcGIS Runtime Tools, highlighted in yellow below:
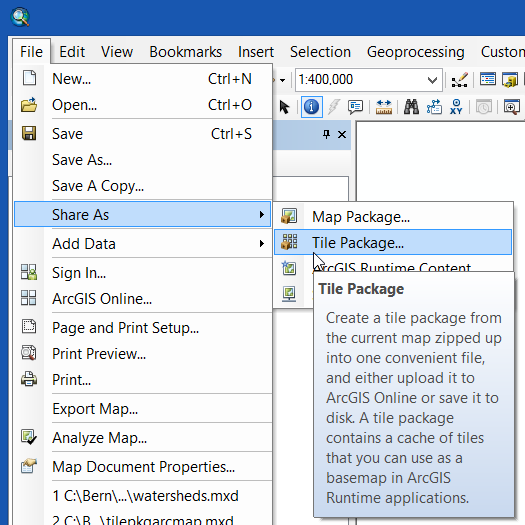
Step 4. Click File, Share As, then choose Tile Package.
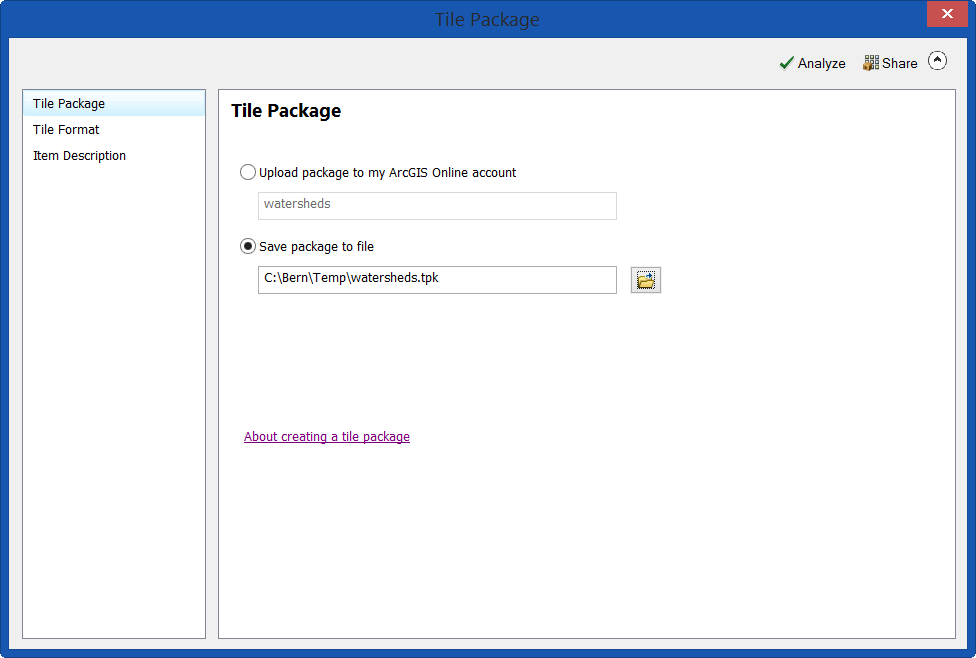
Step 4. Specify the desired options in the Tile Package dialog. Options include:
- Tile Package: Choose to upload the tile package directly to your ArcGIS Online account, or save the tile package locally and upload it later.

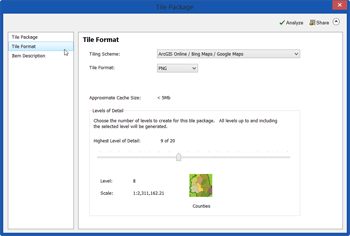
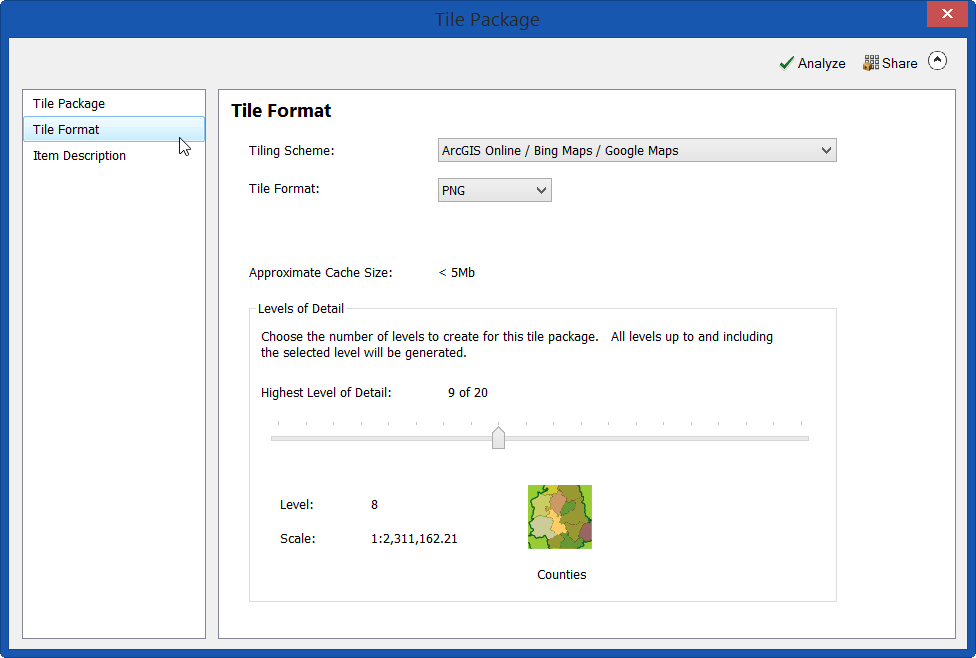
- Tile Format: Choose the tiling scheme and format. If unsure, accept the defaults. Set the highest level of detail desired for tile creation. This setting will determine the scale at which tiles will be displayed, and will change the size of the tile package – the higher the level of detail, the more tiles will be created, and the larger the package.
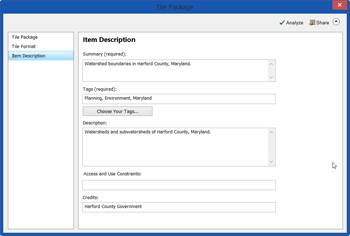
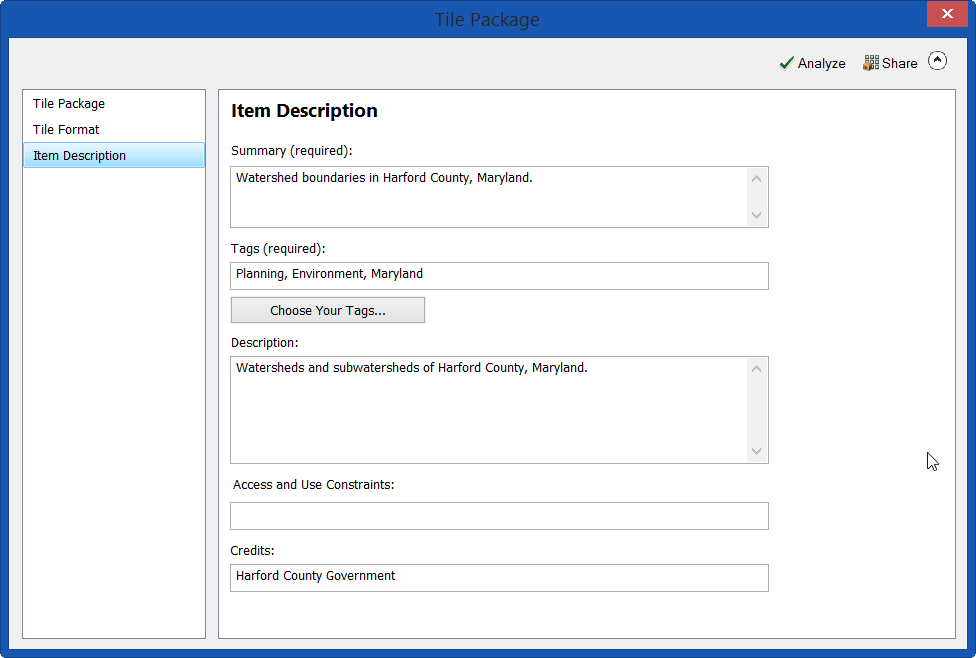
- Item Description: Include the required information for creating the tile package. If the Map Document Properties (File > Map Document Properties) have previously been completed, they will be displayed.
Note: Tile packaging in ArcMap occurs in-process, meaning that ArcMap will be busy until the tile packaging is complete. Tile package creation can take a few minutes, or many hours (even overnight or longer), depending on the extent of the data and levels of detail chosen.
Create tile packages using ArcGIS Pro
Step 1. Open ArcGIS Pro and sign in to your account if you have not done so already. In the upper right corner click Sign In.

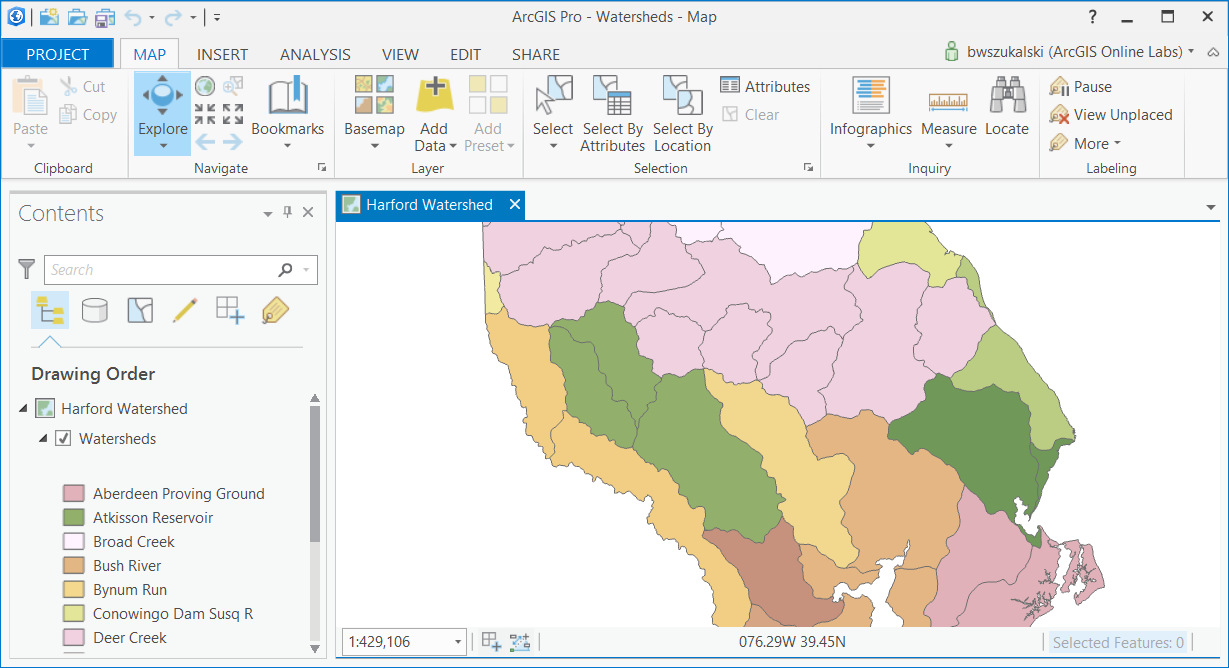
Step 2. Author the map as you would like it displayed in the hosted layer.
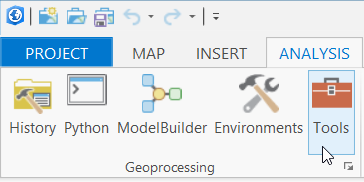
Step 3. Open the Create Map Tile Package tool. On the Analysis tab, click Tools.
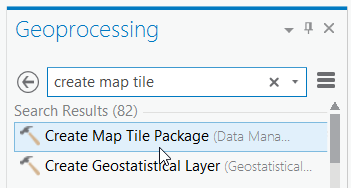
If the tool is not already in your recents or favorites, locate it using search in the Geoprocessing pane.
You can add the tool to your Analysis Gallery for easy access. See Analysis gallery for more information.
Step 4. Create the tile package. Complete the information and options in the Create Map Tile Package tool pane, then click Run.
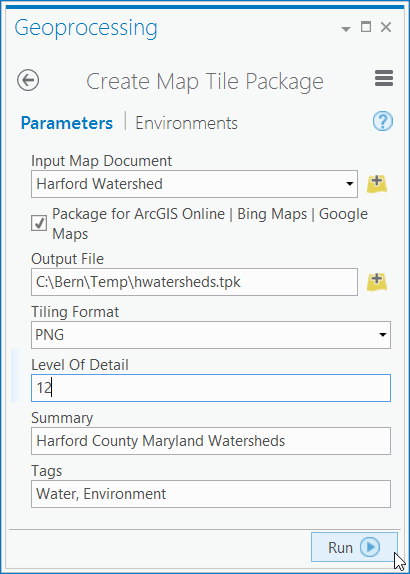
The tool runs in a separate process, so you can continue to work in ArcGIS Pro. Check the notification area in the tool pane for successful completion.
![]()
Adding tile package items
Once you’ve created the tile package, add the tile package item to your ArcGIS account. You can upload tile packages directly from My Content, or use tools available in ArcGIS for Desktop.
Upload using ArcGIS Online
To upload tile packages as items to your ArcGIS account, follow the steps below.
Step 1. Sign in to your ArcGIS account.
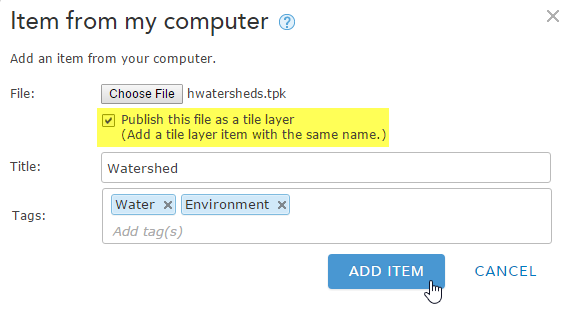
Step 2. Go to My Content, click Add Item, and choose From my computer.

Step 3. Browse for the tile package, enter a title and tags, and click Add Item. Note that you can choose to publish the tile package immediately on upload, or can upload the item and publish it later. The option is highlighted in yellow below.
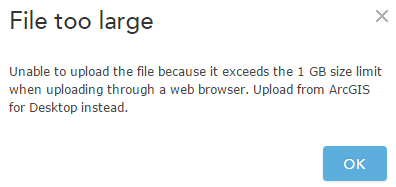
When attempting to upload tile packages exceeding 1 GB, you will see the following message. If the tile package exceeds the size limit for web uploading, upload the package using ArcGIS for Desktop (described below).
Upload tile packages using ArcMap
Step 1. Ensure you have signed in to your ArcGIS account.
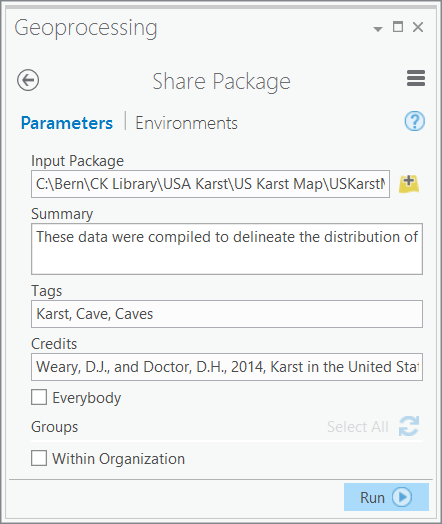
Step 2. Open the Share Package geoprocessing tool. Click Geoprocessing, then choose Search For Tools.
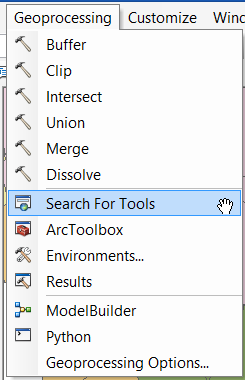
Enter “share package” and locate the Share Package (Data Management) tool, highlighted in yellow below.

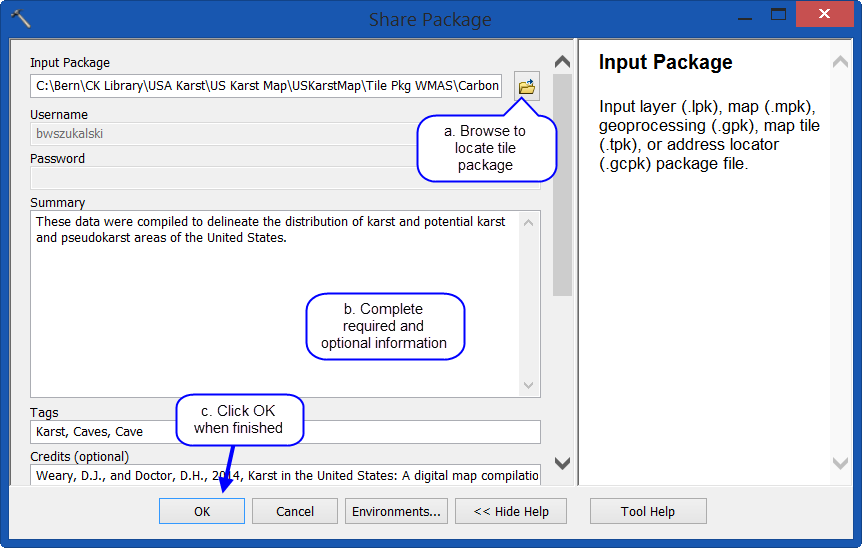
Step 3. Upload the tile package by browsing to choose the tile package from its location on disk, completing the required and optional information, then clicking OK.
The tile package item will be uploaded to My Content.
Upload tile packages using ArcGIS Pro
Step 1. Ensure you have signed in to your ArcGIS account.
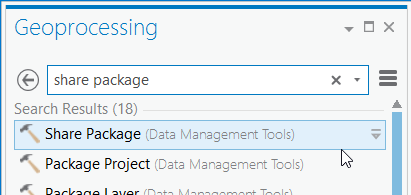
Step 2. Locate the Share Package tool. On the Analysis tab, click Tools.
In the Geoprocessing pane, enter “share package” in search to locate Share Package (Data Management) highlighted below.
Step 3. Upload the tile package by browsing to the the package location on disk, completing the required and optional information, and clicking Run to execute the tool.
The tile package item will be uploaded to My Content.
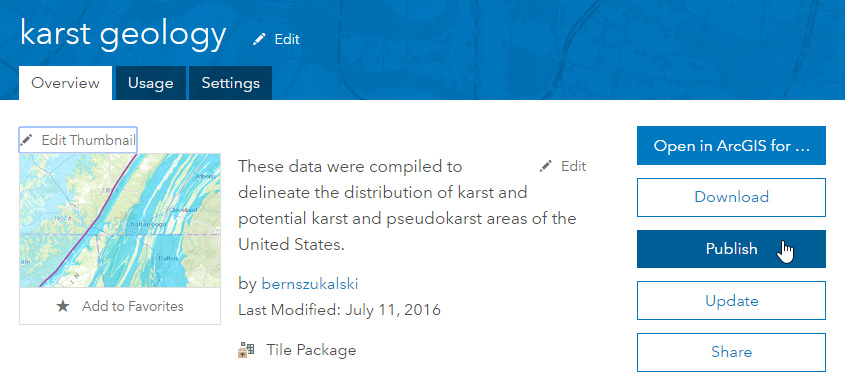
Publishing tile package items
If you have not previously published the tile package, open the item details and click Publish. Note that you will need publish privileges to create hosted layers.
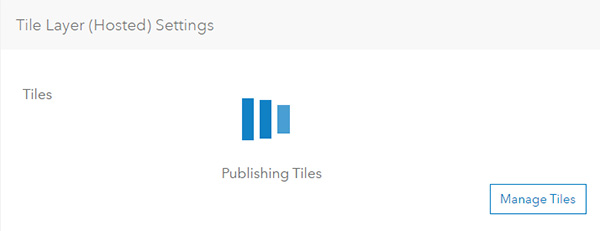
A new tile layer item will be created, and Publishing Tiles will display until publishing has completed.
Summary
Using your ArcGIS for Desktop compute power to create tile packages minimizes credit consumption for publishing hosted tile layers. Credits will be consumed for tile package storage, however once published you can delete the tile package item to further minimize credit consumption.
For more information
- Create Map Tile Package (ArcMap)
- About tile packages (ArcMap)
- How to create a tile package (ArcMap)
- Share Package (ArcMap)
- Create Map Tile Package (ArcGIS Pro)
- Share Package (ArcGIS Pro)
- Add items
- Publish tiles
- About hosted web layers
This post was originally published February 10, 2016, and has been udpated.


Article Discussion: