NetBeans is another great development environment that allows programmers to quickly and easily build great desktop, mobile and web applications with Java. NetBeans also supports mobile and Web development with Java, C++, and many different scripting languages. The NetBeans IDE is free, open source, and has a worldwide community of users and developers.
Because the ArcGIS Runtime SDK for Java provides a pure Java API and development experience, it plugs in nicely with IDEs such as NetBeans, even though the ArcGIS Runtime SDK does not ship with NetBeans modules.
It is very simple to configure your NetBeans environment for ArcGIS development, and this blog describes these easy steps. We will use an example of creating a basic Java application in NetBeans 7.3 (Beta 2) that displays a Map containing layers of information from an ArcGIS Online Webmap.
Create a NetBeans project
To create a project, go to File–>New Project and select Java Application from the Java category.
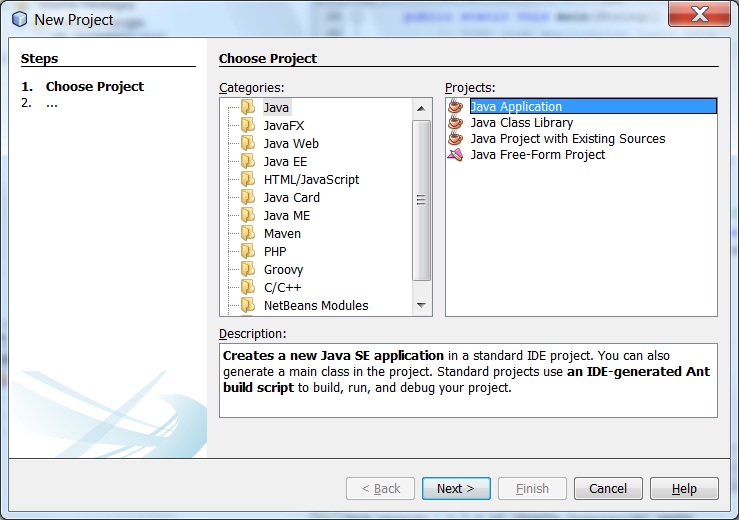
Supply a project name, location on disk, and a package and class name of your choice.
Create a new library to be used in your project
There are a number of ways to add the individual ArcGIS jars as library references to your new project. In this case, let’s create a new library from scratch that will contain all the jars. This is a good approach if you want that one library to be shared across any of your Netbeans projects.
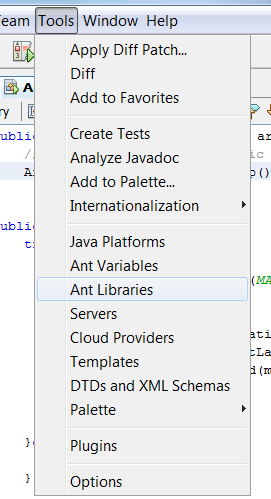
From the Netbeans main menu bar, select ‘Tools’ and click ‘ANT Libraries’:
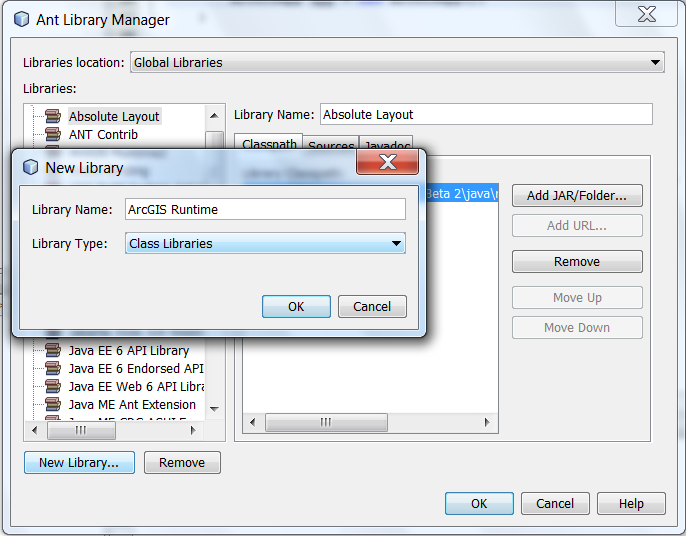
In the dialog that appears, click the ‘New Library…‘ button in the lower left part of the dialog. Give the library a name, something like ‘ArcGIS Runtime’.
 Now, add all of the ArcGIS Runtime SDK Java jar files to your new library. Click on the ‘Classpath‘ tab in the ANT Library Manager dialog and click the ‘Add JAR/Folder..‘ button. Navigate to the location on disk where your SDK was installed and go further down to the sdk\jars folder. Select all of these jars and click the ‘Add JAR/Folder’ button.

Optionally, you can configure the Javadoc access for your new ArcGIS Java library by clicking the Javadoc tab and adding the javadoc jars for the ArcGIS Runtme SDK. These jars are located in <SDK_installation_home>\sdk\help\api reference\.

Add the new library to your Project
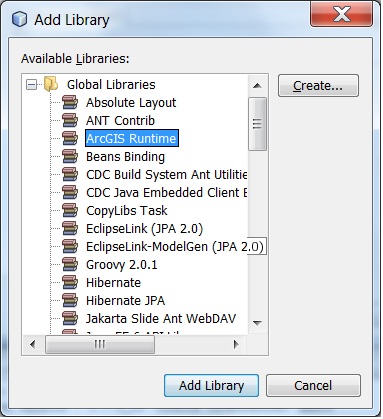
Right-click on your project node in the ‘Projects’ window and open the Project Properties dialog. In the Categories section, select ‘Libraries’. On the right-hand side of the dialog, click the ‘Add Library’ button. In the dialog that opens, choose the new library you created and click ‘Add Library’
Start coding!
And… that’s it! You are ready to start building applications or embeddable solutions with the world’s richest and most powerful geospatial API, in one of the world’s most widely-used Java development platforms. To finish things off, you can build a simple Java app in your project using the following code. This adds a JMap component to a JFrame, and adds layers from ArcGIS Online to the map.
package com.esri.arcgis;

import com.esri.map.JMap;
import com.esri.map.WebMap;
import java.awt.BorderLayout;
import java.awt.EventQueue;
import javax.swing.JFrame;


public class ArcGISApp extends JFrame {

   // The ID of an ArcGIS Online public Webmap
   private static final String MAP_ID = "4778fee6371d4e83a22786029f30c7e1";

    public static void main(String[] args) {
         EventQueue.invokeLater(new Runnable() {
            public void run() {
                try {
                    ArcGISApp application = new ArcGISApp();
                    application.setVisible(true);
                } catch (Exception e) {
                    e.printStackTrace();
                }
            }
        });
    }

    public ArcGISApp(){
        try{
            JMap map = new JMap();
            WebMap wmap = new WebMap(MAP_ID);
            wmap.initializeMap(map);

            this.setDefaultCloseOperation(EXIT_ON_CLOSE);
            this.getContentPane().setLayout(new BorderLayout());
            this.getContentPane().add(map,BorderLayout.CENTER);
            this.setSize(600,400);

        }catch(Exception e){
            e.printStackTrace();
        }
    }
}

Commenting is not enabled for this article.