One issue we hear about from the folks who teach cartography with ArcGIS is that users who are new to ArcGIS have some frustration in learning how to make minor customizations to symbols in the style files that come with ArcGIS. For example, removing a layer from a multi-layer symbol, changing the color of part of a multi-layer symbol, or other minor edits that (in theory) ought to be easy to figure out how to do.
The good news is that there are only two steps to get to
these settings, and knowing these steps is half the battle.
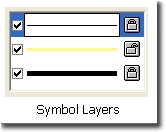
- Left-click on a symbol in ArcMap’s table of contents
- Click the Properties button in the Symbol Selector dialog.
The rest of this posting is dedicated to explaining the
basics of how to use the Symbol Property Editor, which is shown here for one of the marker symbols in the Esri.style:
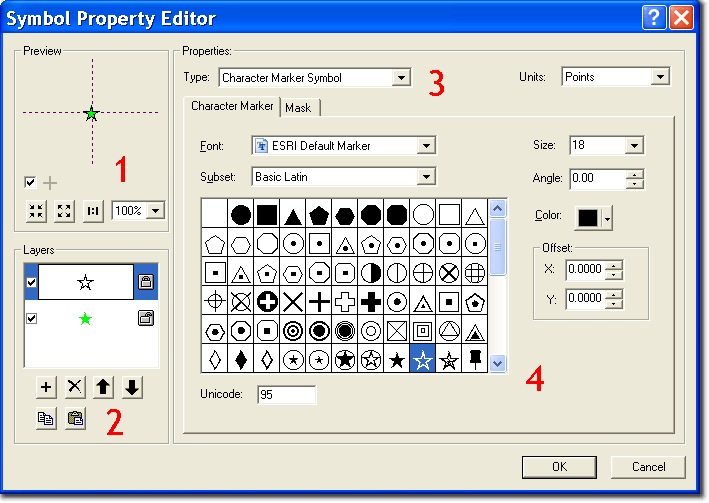
The first thing to know about the Symbol Property Editor is that even though many symbols are just one layer, the editor is designed to create multi-layer symbols. Admittedly, there is a lot going on within this dialog box, so if you’re fairly new to ArcGIS or this part of ArcMap, be sure to take advantage of the context sensitive help button (it’s the question mark next to
the red X in the upper left). Just click on the Question mark, which will change the cursor, and then click on any control in the dialog to read about what it does. Each of the four numbered areas in the image above play a role in the process of customizing symbols:
- The preview is just that, you can see what the complete symbol looks like – note that you can change the zoom factor to get a more detailed look at your symbol here.
- The Layers window is where these most of the work for symbol customizations start. Click on a symbol layer in the list to select it. A symbol layer can be deleted by clicking the delete button just below the list. When you select a symbol layer in the list, its properties are shown on the right portion of the Symbol Property Editor (#3 and #4).
- If building a new symbol, the most important property of a symbol layer is what type of symbol is being used for that symbol layer (character, picture, simple, etc.). It is possible that you may need to create or edit a symbol which is comprised of layers from different marker or line types (e.g. an arrow on top of a picture), therefore you will need to become familiar with the different properties for each type. For example, if you use a Picture Marker Symbol, you can select any file with a BMP or an EMF data type. The difference between the two is that you can use the ArcMap Symbol Property Editor to change the default color of the BMP, but not the EMF.
- This is where each symbol’s specific settings can be changed. For instance, if a symbol layer has its color locked, you would need to change its color here instead of in the Symbol Selector or in ArcMap’s table of contents.
All that said, quite a few of the symbols in the styles that come with ArcGIS were designed for use with a specific kind of map (transportation, geology, etc.). That means colors are often locked for some symbol layers, making it important to be aware of the information described above. However, now that you have the basics you’ll find that it is pretty easy to make use of and customize these symbols.


Commenting is not enabled for this article.