 Feature layers are often the best type of layer to use for visualizing your vector data in web maps. They are easily placed on top of tiled basemaps for geographic context and support interactive queries and selection, on-the-fly styling, and pop-ups.
This post describes several tips for creating better, more useful hosted feature layers from CSV files. While the tips refer to ArcGIS Online, most of them also apply if you are publishing a feature layer to an instance of Portal for ArcGIS.
Data formats and field types
Geographic data formats such as the file geodatabase and shapefile have defined field types for each attribute field (e.g., text, numeric, date, etc.). When you upload one of these sources to ArcGIS Online the data types in the source data are used for the fields in the resulting web layer.
A CSV file, however, is a basic format that does not contain field types for the columns of information it stores. So, when you publish simple tabular data from a CSV to ArcGIS Online each column of data will be assigned a field type in the resulting web layer (more on how that happens later in this post).
Field types are important since they determine how the information in that field is displayed and what capabilities are available for the field or the layer. For example, numeric fields can be included in pop-up charts while date fields can be used to enable time on a layer. Field types also determine which Smart Mapping options are available; for instance Counts and Amounts is only available for numeric fields.
Below is a list of field types used in ArcGIS Online and the information best suited for each type:
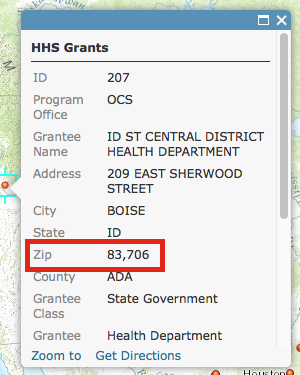
- String: For text fields with mixed alphanumeric characters as well as ZIP codes, FIPS codes, numeric IDs, telephone numbers, and any field that should not be displayed as a number (with comma separators or decimal places). For example, ZIP code 83706 should not be shown as 83,706 or 83,706.00.
- Integer: For numeric fields that represent a count (population, households, cars) or other whole number or integer value (budgets in whole dollars). Integer fields will display comma separators and no decimal places by default.
- Double: Appropriate for numeric data representing averages, normalized fields, or any other decimal number. The default display format is two decimal places with comma separators.
- Date: Dates and/or times. This field type will allow the layer to be time-enabled and has various date/time formatting options.
Publishing feature layers to ArcGIS Online
ArcGIS Online looks at the first few rows of data in a CSV file to determine which field type to use for the resulting hosted feature layer (see Publish features in the help for more details). A field type can also be established if the field name matches any of these common field names:
- String: ZIP
- Location (String): Address, Street, City, State, Country
- Location (Double): Latitude, Longitude, Lat, Long, Lon, X, Y
- Date: Date, Time
Other field names may be recognized when geocoding in locales other than the US; for example, “prefecture” will match if the selected country is Japan.
ArcGIS Online does a good job choosing field types for CSVs, but there are some cases where you may need to override the suggestions. For instance a ZIP field in your CSV might be named “Office ZIP+4 Code” or something else that ArcGIS Online doesn’t recognize. Another case is when a field that contains dates is set as string; if this happens the Enable Time option won’t be available for the layer. If you choose the best field types during publication you won’t have to adjust field formatting settings later, and you’ll ensure the desired styling and configuration options will be available on the resulting layer.
To pick field types for a CSV dataset publish the file using the Add Item button on the My Content page. Then review the field types in the list and click on any types that you want to change to select a different type.
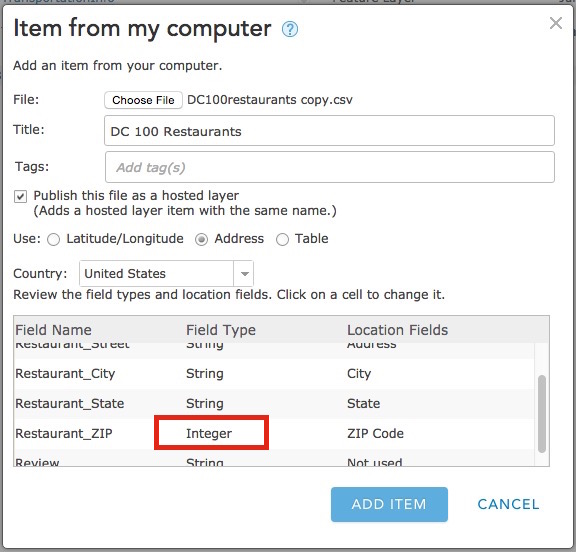

You can always add or remove fields later using the Add/Remove fields tool in the Table view or use this workflow to update it.
You also need to set the fields that are used to geocode your data under the Location Fields column. Most fields used for location (street, city, country, etc.) will be set to String types in the resulting feature service, except X, Y, Lat, or Long, which will be set as Double.
More tips for making feature layers
- Change the name of your CSV file to something readable before uploading.
- Revise the field names in your CSV so they are short and readable. It’s ok to include spaces, ArcGIS Online will use field names with spaces as your field aliases.
- If you are creating a layer for collecting information, the data collection templates provide an empty feature layer with a focused set of fields and field types that can simplify the layer configuration in some cases. To use these go to My Content > Create > Feature Layer > From Template. From there you can also create a new empty feature layer based on the schema of an existing service.
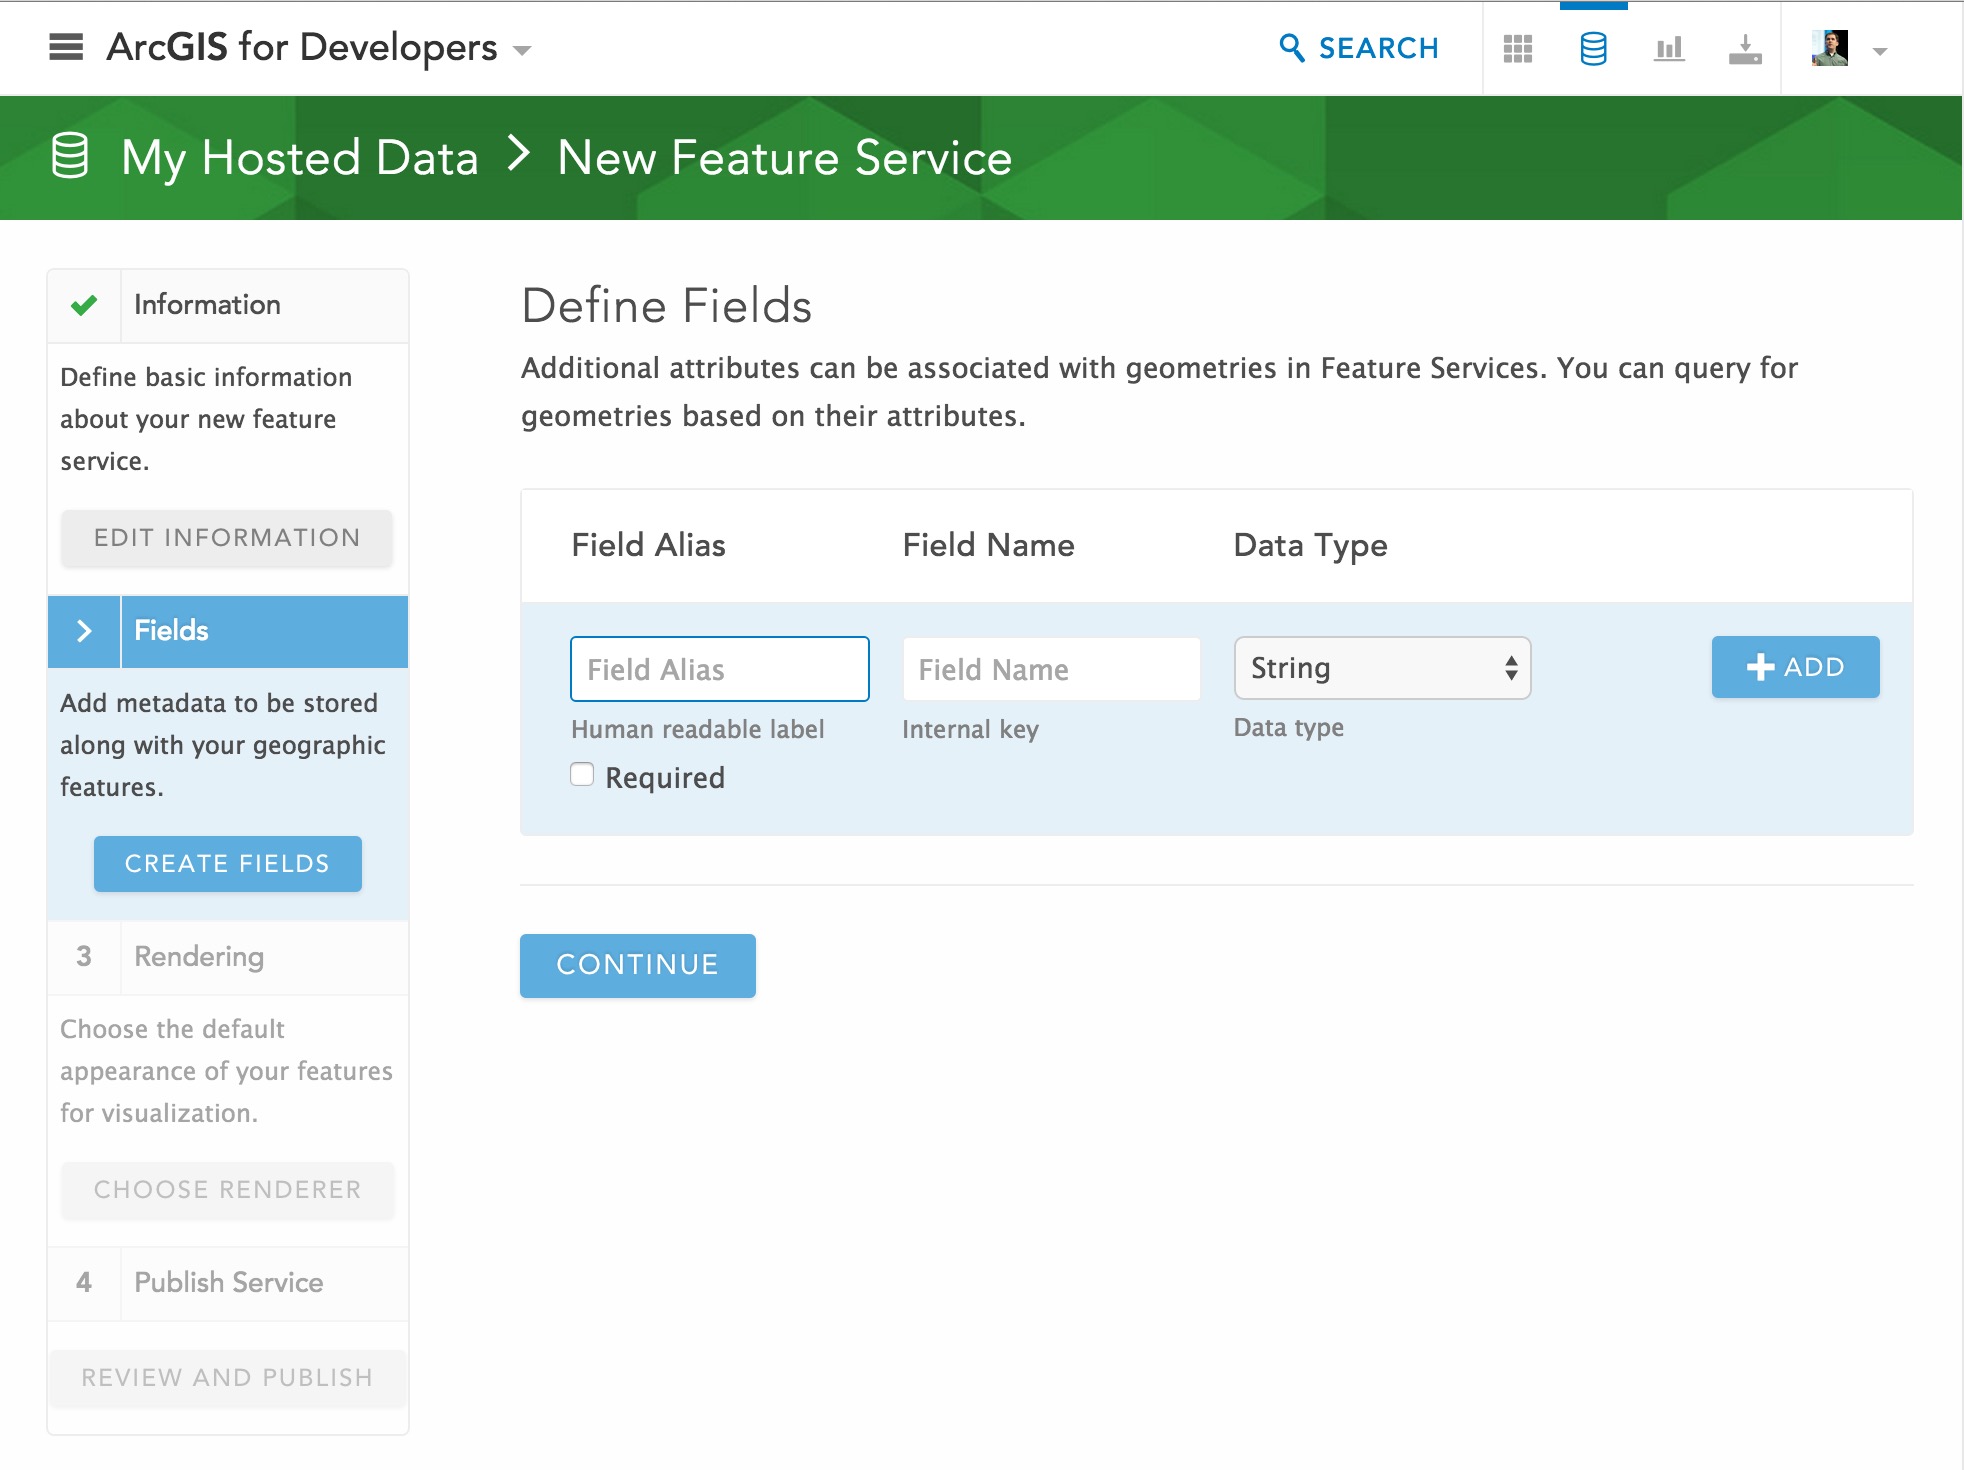
- You can also create feature layers from scratch at the ArcGIS for Developers website. You don’t need a Developer account to use this site. Log in with your Organizational account, click Hosted Data (the cylinder icon) at the top right, then click New Feature Service, and enter the information to define your new feature service.
For more information


Commenting is not enabled for this article.