This blog demonstrates how you can debug a Python Toolbox (.pyt) to troubleshoot and fix any errors that may be causing your tool to fail or produce invalid results.
Python Toolboxes are new at ArcGIS 10.1 and provide a new way to create geoprocessing tools entirely in Python with no requirement to use ArcGIS for Desktop.
The following screen capture illustrates three things you must do to start debugging your Python Toolbox. For clarity, some methods have been collapsed and documentation strings are removed.
- Add a main() function. Within this function, create an instance of the tool class and call it’s execute() method. The arguments for execute()include the parameter information created by the getParameterInfo() method and the messages which are set to None.
- Comment out existing lines for retrieving parameter values, and enter hard-coded parameter values.
- Set a break point at the position where you want to start stepping through the code.
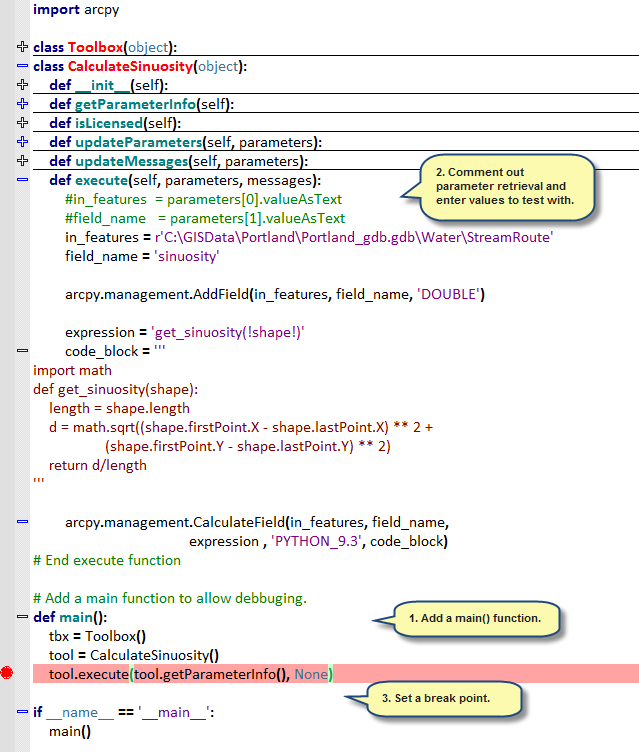
That’s it! In three simple steps, you can begin debugging and troubleshooting any problems with your Python Toolbox. After the problems are fixed, remove the parameter values you entered, as well as, the main() function.
USAGE TIP:
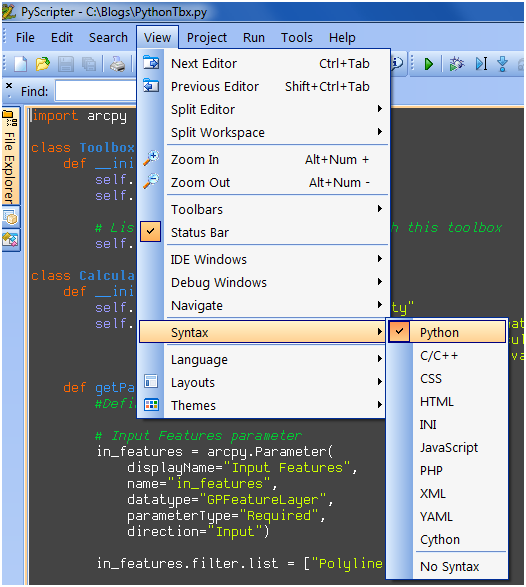
A Python Toolbox is an ASCII-based file with a .pyt extension. By default, Python IDE’s do not recognize this extension as a Python file type. Fortunately, most IDE’s have an option where you can change the syntax to Python. Here are the steps to do this in PyScripter and Wing IDE.
PyScripter – Go to the View menu, Syntax and select Python.
Wing IDE – Go to the Source menu, Current File Properties… and select the File Type to be Python.


Commenting is not enabled for this article.