Tree symbols are a great way to enhance the appearance of a large scale, detailed map. To make attractive point symbols for trees, you need a good place to start from and thankfully all of us ArcGIS users have that. Using multi-layer character marker symbols, the variety of tree symbols you can create is endless. This blog is meant to introduce (or reintroduce) you to the Esri US Forestry 2 font. It is also meant to give you some tips for creating a variety of tree symbols to use on your maps.
The most important part of the process to understand is the Symbol Property Editor and the capabilities/functionalities that are available to you in this dialog. If you aren’t familiar with the Symbol Property Editor dialog, a good starting point to learn more about it is a previous Mapping Center blog post: Customizing Multi-Layer Symbols. 
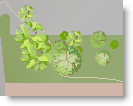
With the Symbol Property Editor, you can create multi-layer symbols, which are symbols that are composed of multiple layers of graphics within one symbol. In the examples above, you can see how the layers can be combined to create an unlimited number of tree symbols.
Using a multi-layer symbol is an effective way to give the impression of “leafiness” to your tree symbols. Incorporating multiple colors, angle rotations, or other characteristics, such as fruits or flowers, make your tree symbols appear truer to reality.
To create your tree symbols, you’ll work with character marker symbols that use the Esri US Forestry 2 font (figure 1).
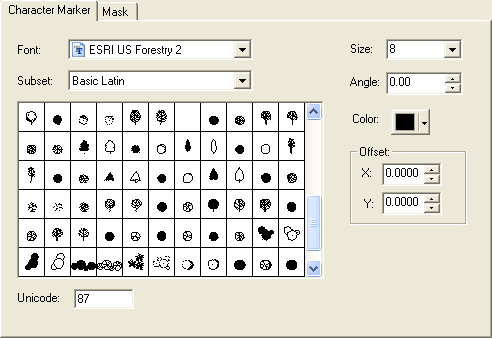
Figure 1. The Esri US Forestry 2 font.
To access this font, first set your symbol type to Character Marker Symbol in the Type dropdown of the Symbol Property Editor. Then, in the Font dropdown, scroll to Esri US Forestry 2 (figure 2).
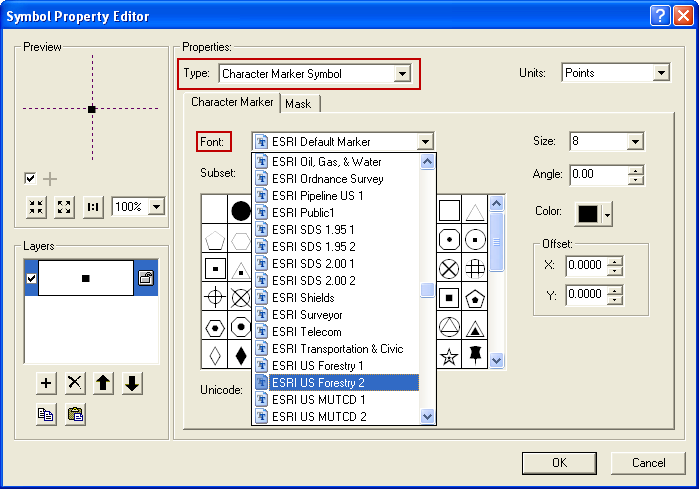
Figure 2. The Symbol Property Editor is used to create Character Marker Symbols.
In this font you will find the individual components needed to create a variety of tree symbols.
To create the tree symbol in figure 3, three layers are used. Each layer within the symbol has its own properties. The first and third layers of the symbol both use the same character marker (Unicode 189), while the second layer’s character marker symbol is Unicode 187. Each layer is a different color; the first layer is a lighter shade of green than the third layer which helps promote the effect of leaves on the same tree with different levels of illumination. The second layer is brown and put in between the first and third layers so it looks as though there are branches in the tree. The second and third layers have an angle of 65 assigned to them with an X Offset of 2 points so they are visible underneath the first layer. Finally, the second layer is approximately 5 points smaller than the first and third layers to give the impression of leaves coming from the branches.
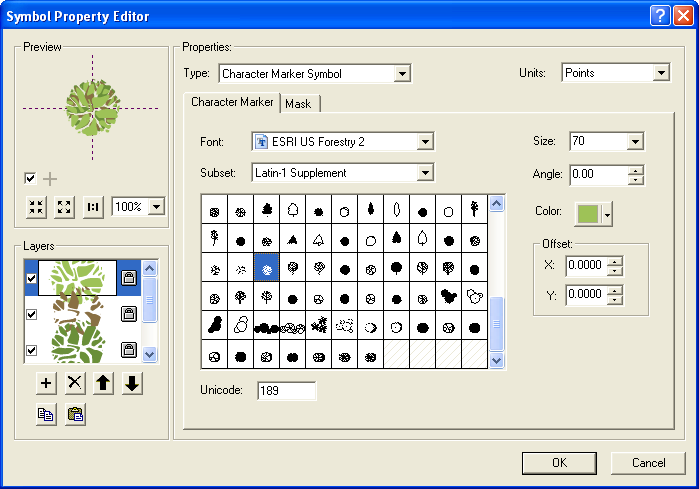
Figure 3. The tree Character Marker Symbols are created as multi-layer symbols.
You can use the sample trees style (.zip file, 0.17MB) associated with this blog post to begin exploring how you can create tree symbols in ArcGIS using the Esri US Forestry 2 font. Look through the sample symbols and the other character markers in the font, play around with them, and most importantly, have fun!

Commenting is not enabled for this article.